
Day 7 - Creating an ASP.NET Core Web Application
Disclaimer: I am not on the .NET Core Team. I used the tools available publicly and have no insights into the future of .NET Core. It looks very bright though. :)
Intro
A complete list of post in this series is included below :
- Day 1 - Installing and Running .NET Core on a Windows Box
- Day 2 - Taking a Look at the Visual Studio Templates for .NET Core
- Day 3 - Running a .NET Core app on a Mac
- Day 4 - Creating a NuGet Package from .NET Core app
- Day 5 - Creating a Test Project from .NET Core
- Day 6 - Migrating an existing .NET Core to csproj
- Day 7 - Creating an ASP.NET Core Web Application
- Day 8 - Using Visual Studio Code with a .NET Core Console Application
- Day 9 - Creating a .NET Core Console App inside of Visual Studio Code
- Day 10 - Using JetBrains Rider with a .NET Core Console Application
In this post, we’re going to look at how you can use ASP.NET Core to create a web application.
Back to the templates
When we first started our look at .NET Core we saw the following templates were available after installing the Visual Studio Tools.
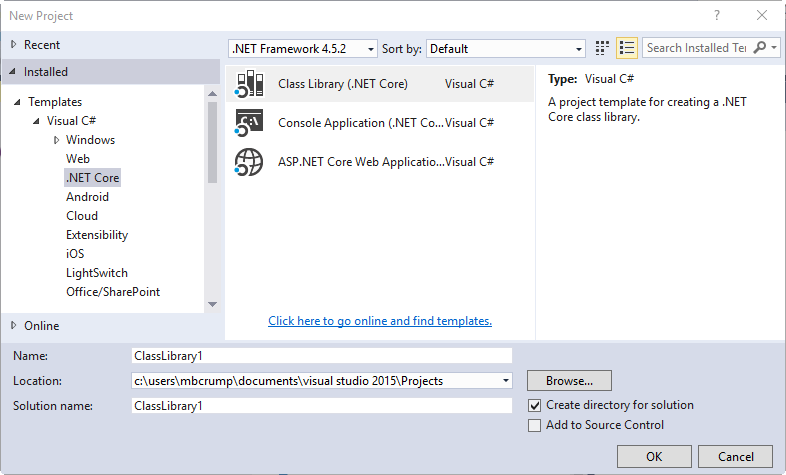
While we took a look at the Console app, I didn’t examine the ASP.NET Core Web Application (.NET Core) template. Let’s do that now and you will be prompted with the following choices :

Go ahead and select Empty and make sure Host in the Cloud is not selected.
Looking at the file structure
If you’ve worked with ASP.NET applications before, then you might notice the file structure in Solution Explorer is a bit different.
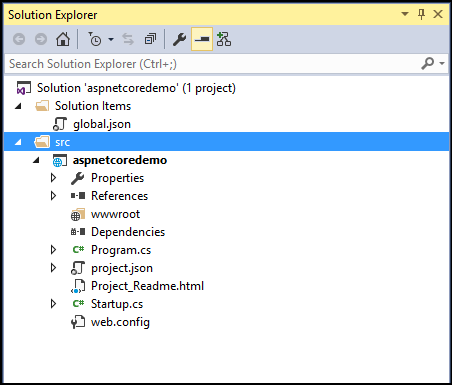
There is a global.json file which contains the project folder the solution is expecting as well as what SDK it is using. The structure now has a src folder which contains our source code. There is now a wwwroot folder which will contain all of our static files such as HTML, CSS, JavaScript. A project.json that we’ve talked about before and finally a Startup.cs instead of a Global.asax file.
There is still a web.config but this is only for IIS. It actually isn’t needed at all as with ASP.NET Core, as folks are able to run an ASP.NET Core apps on Windows, Mac or Linux.
IIS and ASP.NET Core
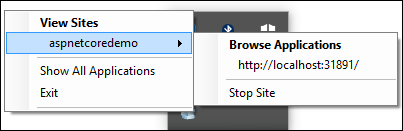
But if you go ahead and run the application then your web browser will open and it will display a simple Hello World text. Since we’re on Windows, we used Internet Information Services (IIS) to create and use a port and serve the site to a local browser. In fact, if you take a look at your System Tray then you can see IIS running your app. This will be very familiar if you’ve used IIS in the past.
Changing the Code while the web app is running
You can open the Startup.cs file from another application such as Notepad and change the following line of code in the ConfigureServices method :
app.Run(async (context) =>
            {
                await context.Response.WriteAsync("Goodbye World"); //Changed from Hello World to see changes live
            });
Now if your web app is running (outside of debug mode), then the text will change on the page from Hello World to Goodbye World without ever having to go back into Visual Studio and running the app again. As a matter of fact, you can use whatever text editor that you want to change the code. Nice!
A Quick Note on the File System
The Solution Explorer responds to files being added or deleted outside of Visual Studio. So no more going to “Add New Item” or “Remove Item” for simple changes. Here is a simple demo of where I deleted a file and then added one. I hope this helps!

Wrap-up
I’m still having a lot of fun learning this technology! As always, thanks for reading and smash one of those share buttons to give this post some love if you found it helpful. Also, feel free to leave a comment below or follow me on twitter for daily links and tips.
Leave a Comment