
Day 5 - Creating a Test Project from .NET Core
Disclaimer: I am not on the .NET Core Team. I used the tools available publicly and have no insights into the future of .NET Core. It looks very bright though. :)
The working source code for this project can be found here.
Intro
A complete list of post in this series is included below :
- Day 1 - Installing and Running .NET Core on a Windows Box
- Day 2 - Taking a Look at the Visual Studio Templates for .NET Core
- Day 3 - Running a .NET Core app on a Mac
- Day 4 - Creating a NuGet Package from .NET Core app
- Day 5 - Creating a Test Project from .NET Core
- Day 6 - Migrating an existing .NET Core to csproj
- Day 7 - Creating an ASP.NET Core Web Application
- Day 8 - Using Visual Studio Code with a .NET Core Console Application
- Day 9 - Creating a .NET Core Console App inside of Visual Studio Code
- Day 10 - Using JetBrains Rider with a .NET Core Console Application
In this post, we’re going to look at how to create a test from .NET Core and run it through the command prompt and inside of Visual Studio.
Creating a Test Project
Before we begin, make sure you have the app found here if you want to follow along.
If you go to File-> New Project (in Visual Studio) and look for .NET Core then you will see the following templates :
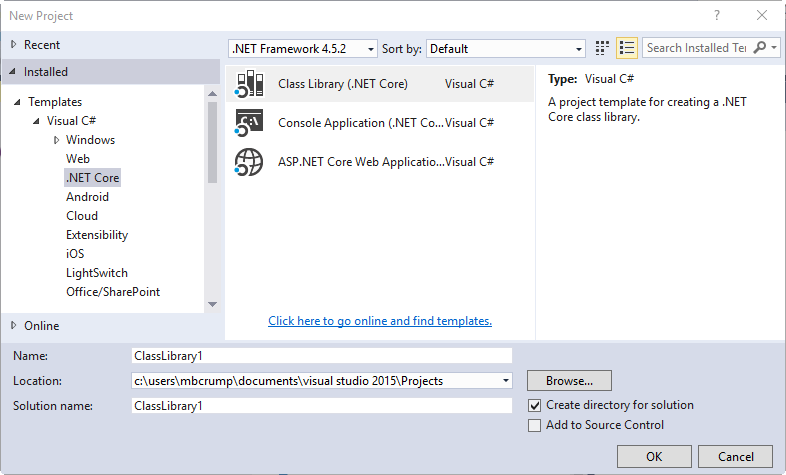
The only problem here is that there isn’t a template for Test like there is for the other types.
Back to the Command Prompt
After opening the app or downloading it, open the folder containing the project in the command prompt.
Create a new folder called tests and change to inside of the directory.
Run the following command :
dotnet new -t xunittest
You will see the following output :
Created new C# project in C:\Users\mbcrump\Documents\Visual Studio 2015\Projects\NetCoreConsoleApp\tests.
The following files were just created :
- project.json
- Tests.cs
If you look inside the Tests.cs, then you may notice that it contains one simple test that always returns true. So therefore the test will always pass.
namespace Tests
{
    public class Tests
    {
        [Fact]
        public void Test1()
        {
            Assert.True(true);
        }
    }
}
That’s great, how do we run it?
We first need to run dotnet restore to restore the packages.
After that is complete, run dotnet test command to run the tests. You will see the following output after it has compiled successfully :
xUnit.net .NET CLI test runner (64-bit win10-x64)
  Discovering: tests
  Discovered:  tests
  Starting:    tests
  Finished:    tests
=== TEST EXECUTION SUMMARY ===
   tests  Total: 1, Errors: 0, Failed: 0, Skipped: 0, Time: 0.193s
SUMMARY: Total: 1 targets, Passed: 1, Failed: 0.
Notice that one test passed and zero failed. This is great and all, but I prefer to use Visual Studio for my tests.
Back to Visual Studio
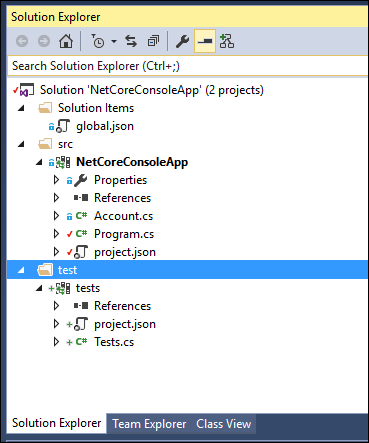
Go into Solution Explorer and Add an Existing Project to your solution. I usually create a virtual folder called test for my test code. You can do that if you wish.
It should look like the following :
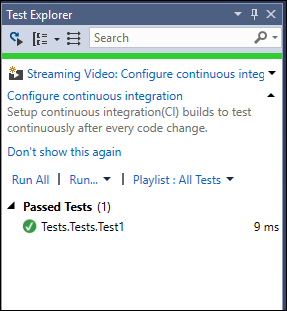
Take the options Test-> Window-> Test Explorer from the Visual Studio menu and you will see the one test that we have is ready to run. Go ahead and select Run All and you should see the following :
Great! Now you can quickly change the Assert.True(true); line to Assert.True(false); to make the test fail and check that functionality.
If you stop right here and take a look at your build output then you will see the following :
1>  C:\Program Files\dotnet\dotnet.exe build "C:\Users\mbcrump\Documents\Visual Studio 2015\Projects\NetCoreConsoleApp\tests" --configuration Debug --no-dependencies
1>  Project tests (.NETCoreApp,Version=v1.0) will be compiled because inputs were modified
1>  Compiling tests for .NETCoreApp,Version=v1.0
1>  Compilation succeeded.
Notice that the test is targeting .NET Core 1.0, just like when we ran this from the command prompt.
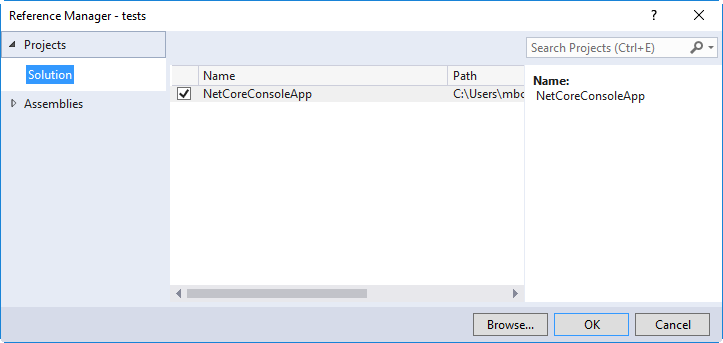
You can now right click on references and add a reference to the local package as shown below :
Go back to your Tests.cs and write your first test!
Wrap-up
As always, thanks for reading and smash one of those share buttons to give this post some love if you found it helpful. Also, feel free to leave a comment below or follow me on twitter for daily links and tips.
Leave a Comment