
Azure Tips and Tricks Part 47 - Creating a Container Image with Docker
Intro
Most folks aren’t aware of how powerful the Azure platform really is. As I’ve been presenting topics on Azure, I’ve had many people say, “How did you do that?” So I’ll be documenting my tips and tricks for Azure in these posts.
The Complete List of Azure Tips and Tricks
Containers for the rest of us
For some reason, I find containers are confusing and my goal with my Azure Tips and Tricks is to try to make things easier. In this mini-series, I’ll walk you through Docker and how I use it with Azure. Below is a list of post that you can expect for this week.
- Azure Tips and Tricks Part 45 - Getting Started with Docker and Azure
- Azure Tips and Tricks Part 46 - Run an app inside a Container Image with Docker
- Today - Azure Tips and Tricks Part 47 - Creating a Container Image with Docker
- Azure Tips and Tricks Part 48 - Pushing a Container Image to a Docker Repo
Create an app to run inside a Container Image with Docker
Let’s continue where we left off in our last post, which showed how to use an image from the Docker Store as our base and create our own console app. In this post, we’ll create a new image that we can distribute that contains our new app.
Remember how we used the dotnet build command in the last post? Well if you navigate the file structure of our existing console app, then you’ll see there is a myapp.dll that contains the executable code.
root@40bac5113803:~/myapp/bin/Debug/netcoreapp2.0# dir
myapp.deps.json  myapp.dll  myapp.pdb  myapp.runtimeconfig.dev.json  myapp.runtimeconfig.json
If you navigate back to the root directory, then you can run dotnet run -p /myapp/myapp.csproj to see the Hello World! output.
Let’s save this into a file that we can run later.
Type cd cd /usr/local/bin and then cat > startmyapp.sh. Add #!/bin/bash to the first line and then dotnet run -p /myapp/myapp.csproj to the second line. Press CTRL-D to exit out.
Try out the command by typing sh startmyapp.sh and your app should run.
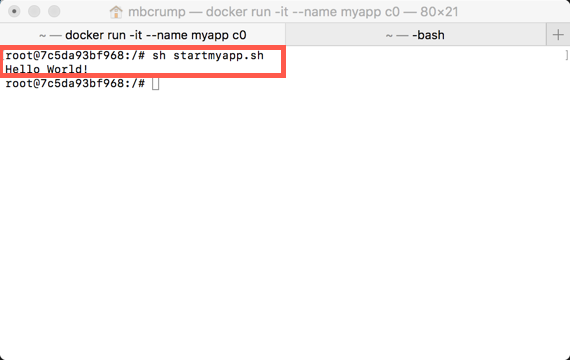
Type exit and you’ll return to Terminal or command prompt window.
Now we want to add our application to a container.
Run docker ps -a to see what the name of our container is.
CONTAINER ID        IMAGE               COMMAND             CREATED             STATUS                      PORTS               NAMES
7c5da93bf968        c0                  "bash"              10 minutes ago      Exited (0) 51 seconds ago                       myapp
Now run docker commit 7c mbcrump:awesomeapp to add the app to a container. After docker commit, we took the first two characters of the container id and created the name mbcrump and gave it a tag of awesomeapp.
Now we can run docker images to see our new image!
Michaels-MacBook-Pro:~ mbcrump$ docker images
REPOSITORY                   TAG                 IMAGE ID            CREATED              SIZE
mbcrump                      mynewapp            82eb1e5914dc        About a minute ago   1.85GB
mbcrump                      awesomeapp          1f254a9917aa        16 minutes ago       1.85GB
microsoft/aspnetcore-build   latest              c0c285a7a306        44 hours ago         1.85GB
Now run docker run 82 startmyapp.sh where 82 is the image id and startmyapp.sh is the shell script that we created earlier.
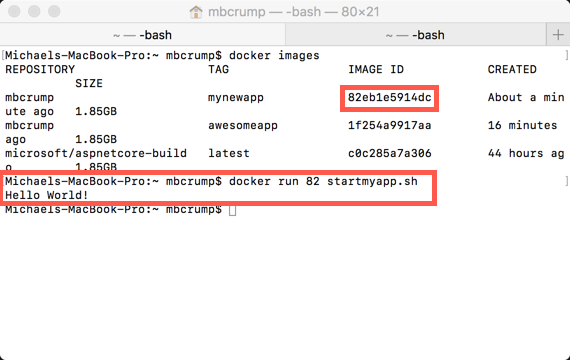
Nice! We now have a container that contains our .NET Core app that we can distribute via the Docker Store and other ways. Anyone who grabs our image will have an environment that they can get started with right away without having to worry about configuration, platform, etc. Now we’re cooking with Docker!
Want more Azure Tips and Tricks?
If you’d like to learn more Azure Tips and Tricks, then follow me on twitter or stay tuned to this blog! I’d also love to hear your tips and tricks for working in Azure, just leave a comment below.
Leave a Comment