
Azure Tips and Tricks Part 125 - Using Azure Function to call our Logic App with the IoT Button
Check out Azure.Source : A very nice mix of Azure news, announcements, videos, podcast and more. Read weekly
Intro
Most folks aren’t aware of how powerful the Azure platform really is. As I’ve been presenting topics on Azure, I’ve had many people say, “How did you do that?” So I’ll be documenting my tips and tricks for Azure in these posts.
The Complete List of Azure Tips and Tricks
Special Thanks
Special Thanks to Stefan Wick on the Azure IoT Team for his review and edits on this post.
The Series so Far
At Build 2018, we first saw the IoT Button. I started exploring the device with the very first unboxing and decided to create a mini-series to walk you how to use the device from start to finish. The series (so far) is located below
- Creating an IoT for the IoT Button
- Configuring and Setting up the IoT Button
- Creating the Azure Logic App for our IoT Button
- Using Azure Function to call our Logic App with the IoT Button
We know how to setup an IoT Hub and configure our device to get on the network, we’ve worked with Logic Apps that will automatically add a row to an excel sheet that includes a time along with a status (such as start or stop). All that is left is to add an Azure Function that calls the Logic Apps and passes a parameter.
Using Azure Function to call our Logic App with the IoT Button
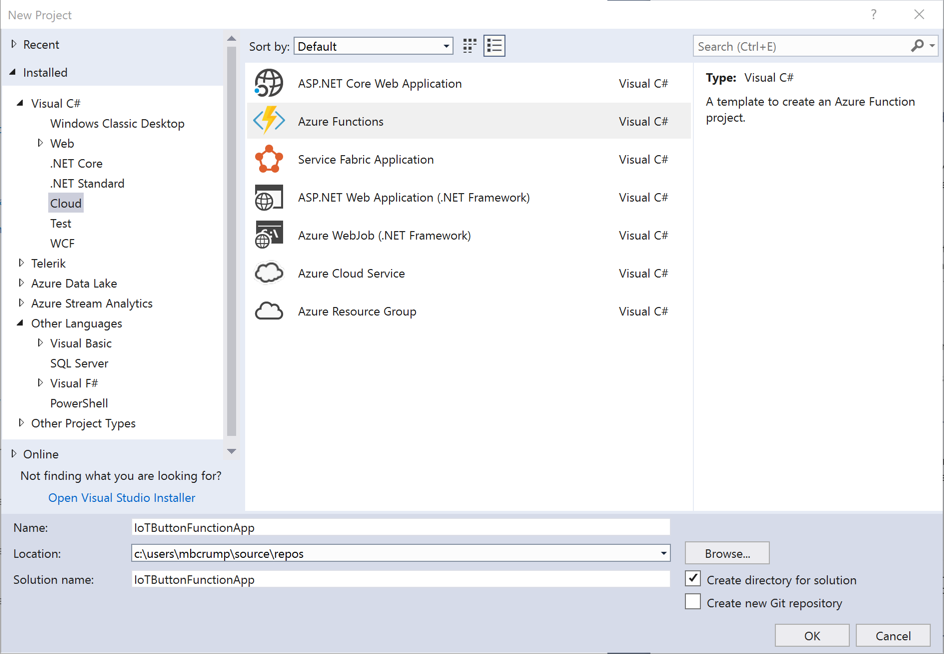
Open Visual Studio and click on Cloud and then Azure Functions and give it a name and click OK.
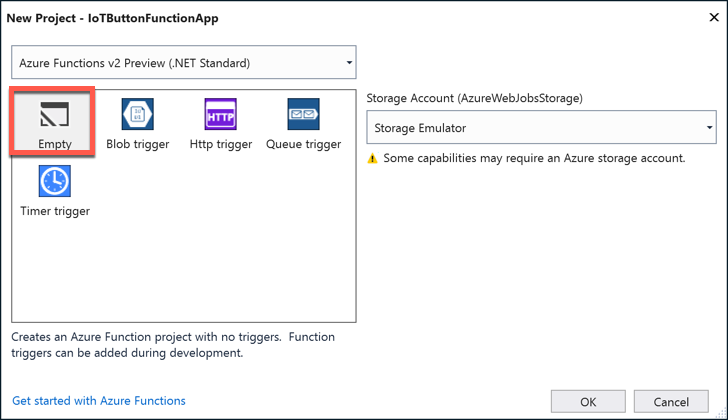
We’ll begin with an Empty project type and Azure Function v2. You can leave the Storage Account as the emulator. We won’t need it.
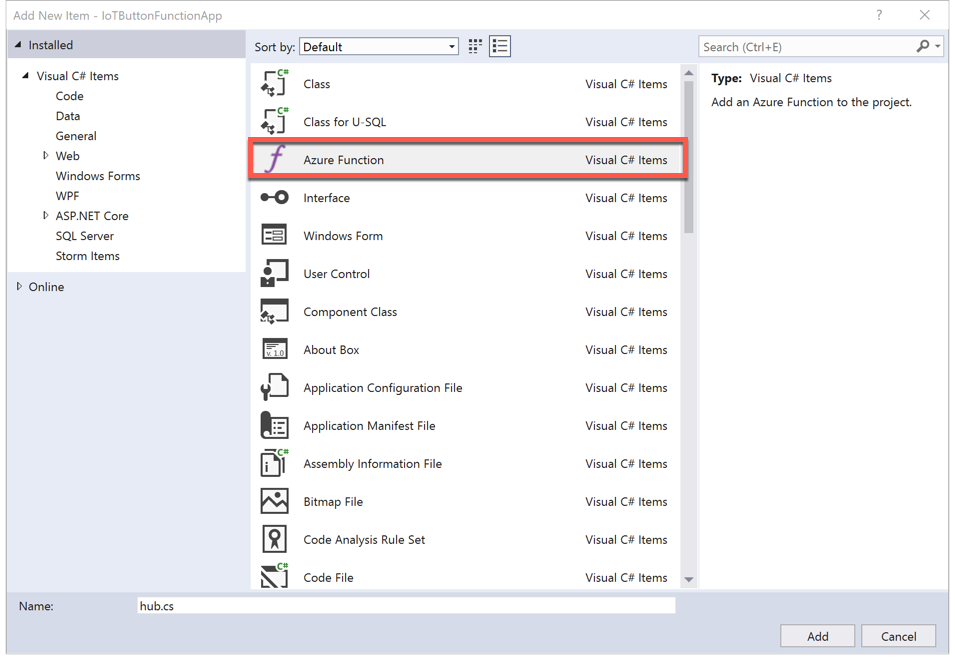
After your project is loaded, we need to add an item. So right click the project and select Add new item and select Azure Functions and give it a name and click Add.
Make sure you select IoT Hub trigger.
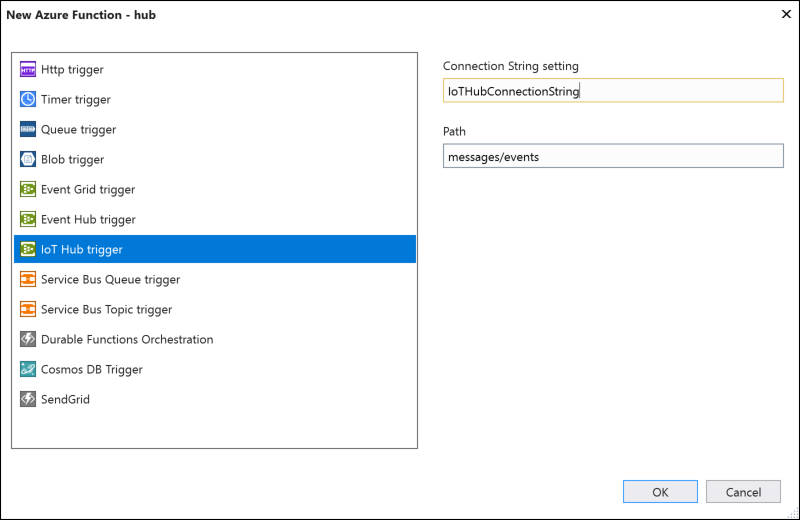
For the Connection string, give it the name IoTHubConnectionString and leave the Path as-is and click OK.
Once your project settles down, go into your local.settings.json and add the following placeholder for our connection string (which will be used shortly:
{
  "IsEncrypted": false,
  "Values": {
    "AzureWebJobsStorage": "UseDevelopmentStorage=true",
    "AzureWebJobsDashboard": "UseDevelopmentStorage=true",
    "IoTHubConnectionString": ""
  }
}
Go into the IoT Hub that you created, select Built-in endpoints, and copy the Event Hub-compatible endpoint to notepad somewhere.
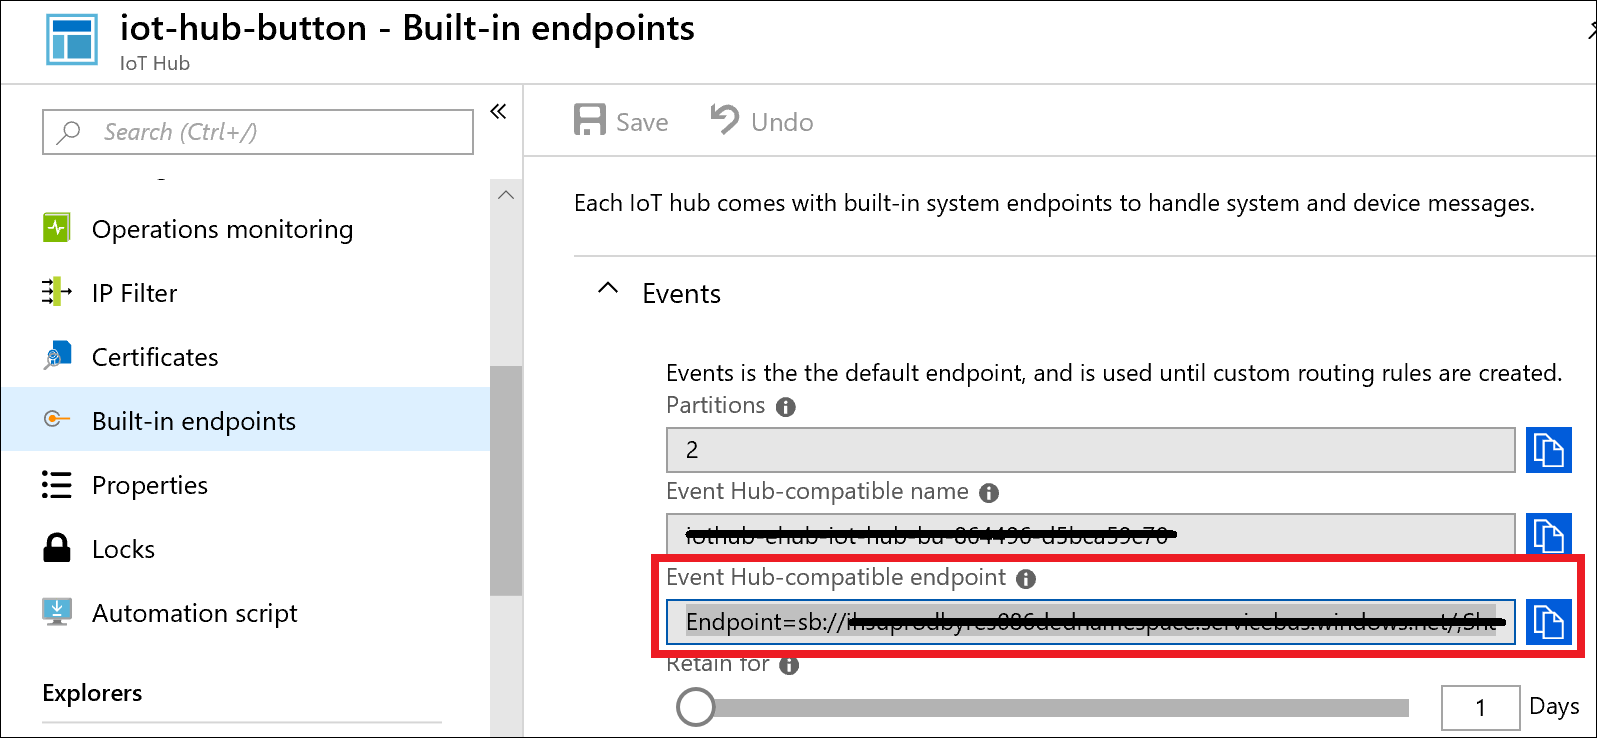
For example mine is Endpoint=sb://xxxservicebus.windows.net/;SharedAccessKeyName=xxx=;EntityPath=myioteventhubcompatiblename. Now copy that into the IoTHubConnectionString field in our local.settings.json.
If you run the application now, you’ll see our function can accept messages. So go ahead and press your IoT Button and you should see something return.

Now in order for our app to use the Logic App, we need to write some code, but remember how we added a status field that the Logic App is looking for?
We’ll first use create a file that will store the value either Started or Stopped and save that on the local machine or published app service site. We’ll create a quick helper method that will toggle the fields every time the function runs.
var persistedCount = LoadCurrentStatus("status.txt");
log.Info("Status is " + persistedCount);

private static string LoadCurrentStatus(string fileName)
{

    var folder = Environment.ExpandEnvironmentVariables(@"%HOME%\data\AzureFunctionAppData");
    var fullPath = Path.Combine(folder, fileName);
    Directory.CreateDirectory(folder);
    string persistedState = "Start";
    if (File.Exists(fullPath))
    {
        persistedState = File.ReadAllText(fullPath);
        if (persistedState == "Start")
        {
            persistedState = "Stop";
        }
        else if (persistedState == "Stop")
        {
            persistedState = "Start";
        }
    }
    File.WriteAllText(fullPath, persistedState);
    return persistedState;
}
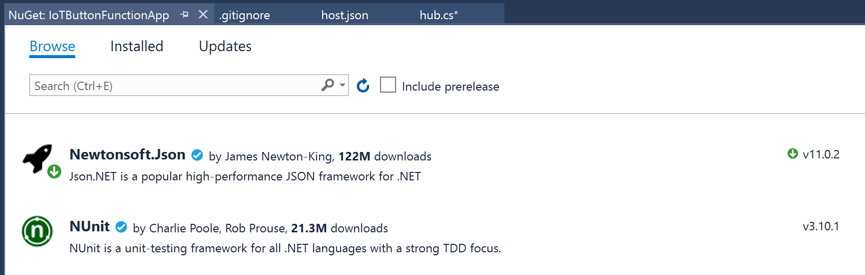
Now we need to send the status to our Logic App. We’ll use Newtonsoft.Json by pulling in the proper NuGet package.
And we’ll add the following status code to be serialized as a class:
public class MyStatus
{
    public string status { get; set; }
}
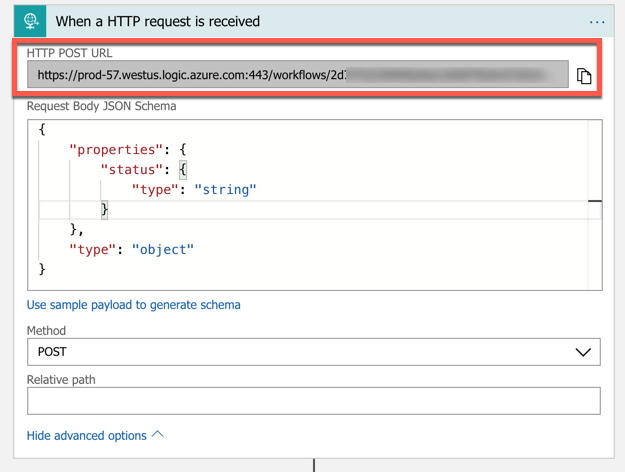
We’ll initialize the field with the current status as indicated on our file system and then set the header and call our Azure Logic App url which can be copied in the Logic App Designer after you save it.
var myContent = JsonConvert.SerializeObject(myStatus);
var buffer = System.Text.Encoding.UTF8.GetBytes(myContent);
var byteContent = new ByteArrayContent(buffer);
byteContent.Headers.ContentType = new MediaTypeHeaderValue("application/json");

await client.PostAsync("https://xxx.westus.logic.azure.com:443/workflows/xxx/triggers/manual/paths/invoke?api-version=2016-10-01&sp=%2Ftriggers%2Fmanual%2Frun&sv=1.0&sig=xxx", byteContent);
Now if we run the Azure Function (either locally or published) and press our IoT Button, then it will call the Logic App and finally insert a Start (or Stop) status along with the DateTime in our Excel workbook.
In the sample below, I’ll use the IoT Button Simulator to paste in my Connection String, which my Azure Function will process and it will call my Logic App which writes an entry to my table in MS Excel. Very cool!
Let me know other ideas that you might have for the IoT Button!
Want more Azure Tips and Tricks?
If you’d like to learn more Azure Tips and Tricks, then follow me on twitter or stay tuned to this blog! I’d also love to hear your tips and tricks for working in Azure, just leave a comment below.
Leave a Comment