
Azure Tips and Tricks Part 83 - Adding an item to a Azure Storage Table
Azure Developer Guide Book 2nd Edition available now! This free eBook is available now at aka.ms/azuredevebook.
Intro
Most folks aren’t aware of how powerful the Azure platform really is. As I’ve been presenting topics on Azure, I’ve had many people say, “How did you do that?” So I’ll be documenting my tips and tricks for Azure in these posts.
The Complete List of Azure Tips and Tricks
Adding an item to a Azure Storage Table
In case you are new to the Azure Storage Tables, we’ve reviewed the following items this week:
- Creating your first Azure Storage Table
- Today - Adding an item to a Azure Storage Table
- Reading an item from a Azure Storage Table
- Updating an item from a Azure Storage Table
Today, we’ll be taking a look at adding an item to the Azure Storage Table that we were working with yesterday.
As a refresher, Azure Storage Blobs can store any type of text or binary data, such as a document, media file, or application installer. Blob storage is also referred to as object storage.
Getting Started
Open the C# Console application that we were working with previously and let’s add a folder called Entities and add a class named Thanks.
Copy the following code into your new class:
using Microsoft.WindowsAzure.Storage.Table;
using System;

namespace StorageAccountAzure.Entities
{
    class Thanks : TableEntity
    {

        public string Name { get; set; }
        public DateTime Date { get; set; }

        public Thanks(string name, DateTime date)
        {
            Name = name;
            Date = date;
            PartitionKey = "ThanksApp";
            RowKey = name;
        }

        public Thanks()
        {

        }
    }
}
This code will use a base class of TableEntity which will make it easier to work with Azure Storage Tables. We are going to create two fields in our table named Name and Date. We’ll pass in the Name we want to use via a string and provide the current Date for the Date property.
Heading back over to our Program.cs file. We’ll now add in a helper method to create the item in the table.
static void CreateMessage(CloudTable table, Thanks message)
{
    TableOperation insert = TableOperation.Insert(message);

    table.Execute(insert);
}
This will take advantage of our Thanks class and we’ll pass in the message along with the date in the Main method.
The Main method inside of the Program.cs file just needs to call the method as shown below:
static void Main(string[] args)
{
    CloudStorageAccount storageAccount = CloudStorageAccount.Parse(
                    CloudConfigurationManager.GetSetting("StorageConnection"));

    CloudTableClient tableClient = storageAccount.CreateCloudTableClient();

    CloudTable table = tableClient.GetTableReference("thankfulfor");

    table.CreateIfNotExists();

//added this line
    CreateMessage(table, new Thanks("I'm thankful for the time with my family", DateTime.Now));
//added this line
    Console.ReadKey();

}
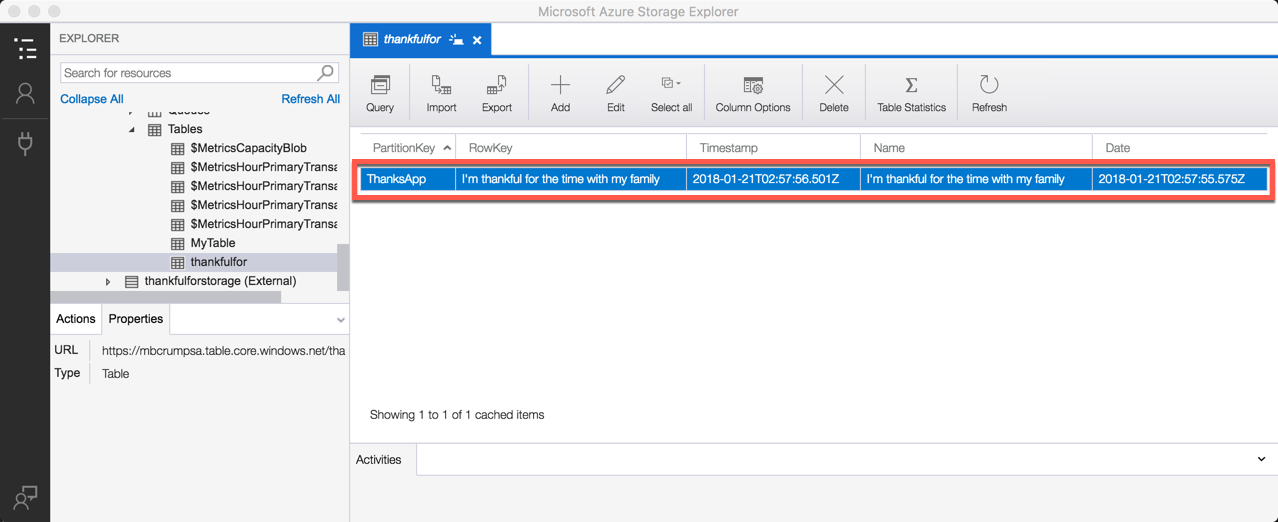
If we run the program now, then it will add our message along with the current DateTime to our Azure Storage Table called thankfulfor. If we want to test it now, then we can use Azure Storage Explorer. If you come back tomorrow, then I’ll show you how to do this through code.
Want more Azure Tips and Tricks?
If you’d like to learn more Azure Tips and Tricks, then follow me on twitter or stay tuned to this blog! I’d also love to hear your tips and tricks for working in Azure, just leave a comment below.
Leave a Comment