
Azure Tips and Tricks Part 75 - Create an Azure Storage Blob Container through C#
Want to Contribute? I’m currently looking for folks who want to contribute to Azure Tips and Tricks. If you are interested, then fill out the form here.
Intro
Most folks aren’t aware of how powerful the Azure platform really is. As I’ve been presenting topics on Azure, I’ve had many people say, “How did you do that?” So I’ll be documenting my tips and tricks for Azure in these posts.
The Complete List of Azure Tips and Tricks
Create an Azure Storage Blob Container through C#
Azure Storage is described as a service that provides storages that is available, secure, durable, scalable, and redundant. Azure Storage consists of 1) Blob storage, 2) File Storage, and 3) Queue storage. In this post, we’ll take a look at creating an Azure Storage Blob container with C#. Yesterday, I described how to do it through the Azure Portal.
Go ahead and open the Azure Portal and navigate to the Azure Storage account that we worked with yesterday.
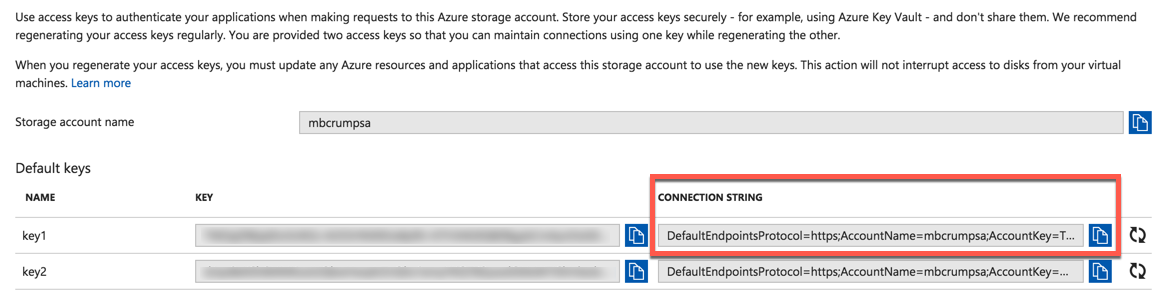
Look under Settings, then Access Keys and copy the connection string.
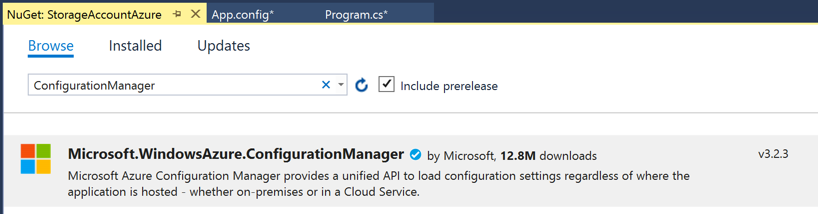
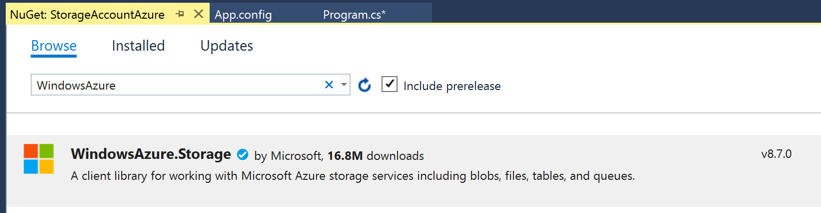
Create a C# Console Application, and use NuGet to pull in references to :
- WindowsAzure.Storage
- Microsoft.WindowsAzure.ConfigurationManager
Inside of your Console app, you will see App.config, now add the following section:
  <appSettings>
    <add key="StorageConnection" value="YOUR-CONNECTION-STRING-COPIED-FROM-EARLIER"/>
  </appSettings>
Copy the following code into your Main method:
static void Main(string[] args)
{
    var storageAccount = CloudStorageAccount.Parse(CloudConfigurationManager.GetSetting("StorageConnection"));
    var myClient = storageAccount.CreateCloudBlobClient();
    var container = myClient.GetContainerReference("images-backup");
    container.CreateIfNotExists(BlobContainerPublicAccessType.Blob);
    Console.ReadLine();
}
This code will get our connection string from the App.config, create our client and a container named images-backup if it doesn’t exist. We can go back inside of the portal to see if executed correctly.
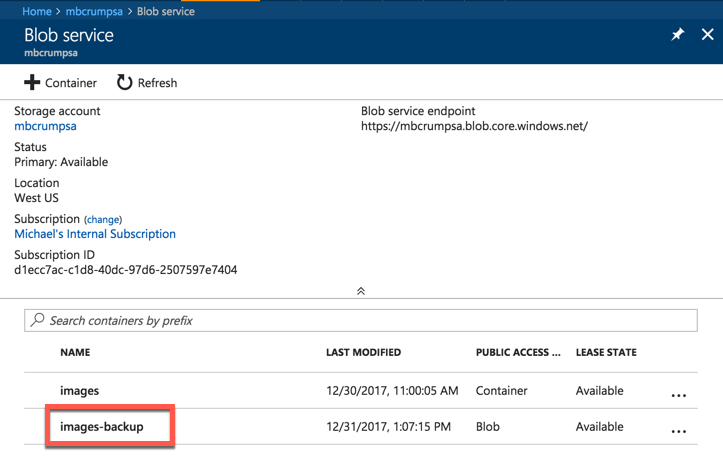
Success! We’ve now accomplished the same task via the Azure Portal and C#.
Want more Azure Tips and Tricks?
If you’d like to learn more Azure Tips and Tricks, then follow me on twitter or stay tuned to this blog! I’d also love to hear your tips and tricks for working in Azure, just leave a comment below.
Leave a Comment