
Azure Tips and Tricks Part 27 - Working with App Settings and Azure App Services
Intro
Most folks aren’t aware of how powerful the Azure platform really is. As I’ve been presenting topics on Azure, I’ve had many people say, “How did you do that?” So I’ll be documenting my tips and tricks for Azure in these posts.
The Complete List of Azure Tips and Tricks
Intro
We’ve recently created a web app and uploaded it to Azure App Service. We also took a look at multiple ways to examine those files through the Azure portal interface and how we’d add extensions and deployment slots for our web app. We also took a look at a feature called Testing in Production and how to use PowerShell to automatically distribute the load between your Production and deployment slot. We wrapped up by looking at the Azure Resource Explorer to explore REST APIs and how to perform load testing. In this post, we’ll take advantage of App Settings to store a Key/Value pair securely in Azure and access it in your web app.
Working with App Settings and Azure App Services
App Settings are used to store configurable items without making any changes to the code. The key-value pairs are stored behind the scenes in a configuration store which is nice because sensitive information never shows up in a web.config, etc. file. In order to take advantage of this, you’ll need to log into your Azure account and go to your App Service that you created and look under Development Tools then you will see Application Settings. Open it and scroll down and you’ll see App Settings as shown below.

We’re going to add an App Setting in Azure. I added one with the key of Environment and the value is set to Staging

Open or create your ASP.NET MVC app and modify the appSettings section of the web.config file to add our Environment key/value pair as shown below :
  <appSettings>
    <add key="webpages:Version" value="3.0.0.0" />
    <add key="webpages:Enabled" value="false" />
    <add key="Environment" value="Production" />
  </appSettings>
Now it is in our web configuration of our app. In order to see the value, we’ll need to add it to a page to display the value.
If you’re using ASP.NET MVC, then navigate to your appname/Views/Home/Index.cshtml file and add the following using statement followed by a call to ConfigurationManager as shown below :
@using System.Configuration
@{
ViewBag.Title = "Home Page";
}
<div class="jumbotron">
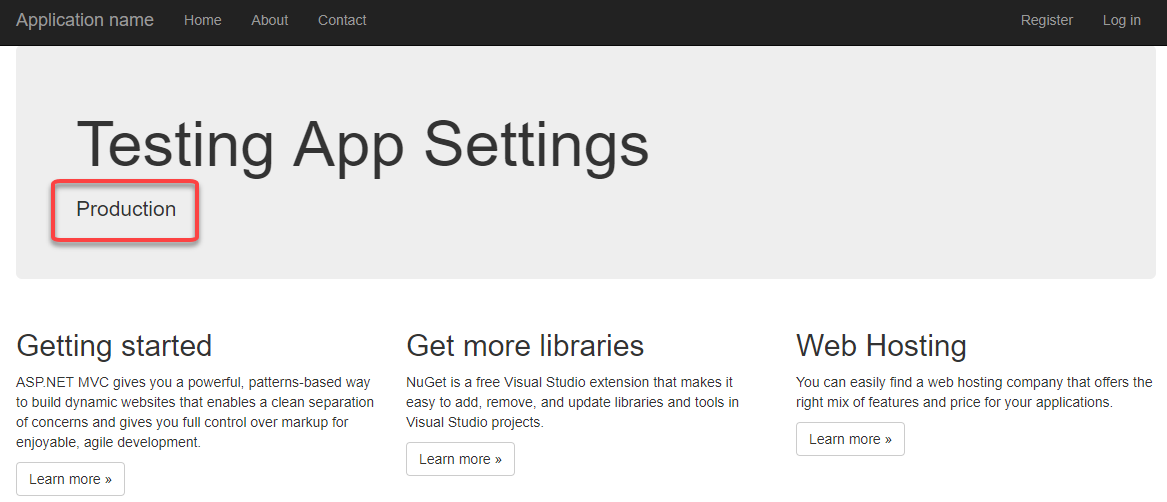
<h1>Testing App Settings</h1>
@ConfigurationManager.AppSettings["Environment"]
</div>
If you run the application locally, then you’ll see Production as it is coming from the web.config file, but if you run it inside of Azure, then you’ll see Staging as it is coming from the App Settings configuration store located in Azure. Neat stuff!
Connection Strings vs. App Settings You may have noticed Connection Strings right below the App Settings option and wondering when to use it. A general rule of thumb is to use Connection Strings for database connection strings and App Settings for key-value pair application settings. If you examine your web.config file, then you’ll see there is also a section for connectionStrings just as there is a section for appSettings.
Want more Azure Tips and Tricks?
If you’d like to learn more Azure Tips and Tricks, then follow me on twitter or stay tuned to this blog! I’d also love to hear your tips and tricks for working in Azure, just leave a comment below.
Leave a Comment