
Azure Tips and Tricks Part 182 - Use VNET peering to connect existing VNETs
ATTENTION: Help shape the future of Azure Tips and Tricks by telling me what you’d like for me to write about! Help me help you by filling out this quick survey.
The Complete List of Azure Tips and Tricks
Use VNET peering to connect existing VNETs
Recently a question came up about how to securely connect existing VNETs. This got me thinking about how I have VMs deployed in their own VNETs.
Often when I set up a VM for a demo, I’ll use the default settings, which creates a VNET for each VM. In this post, I’ll walk you through how to set up a hub-spoke network topology to connect existing VNETs.
My requirements
- Connect three VNETs, one of which has a Point-to-Site gateway configured
- No public IPs attached to VM network interfaces
- Ability to connect to all VMs
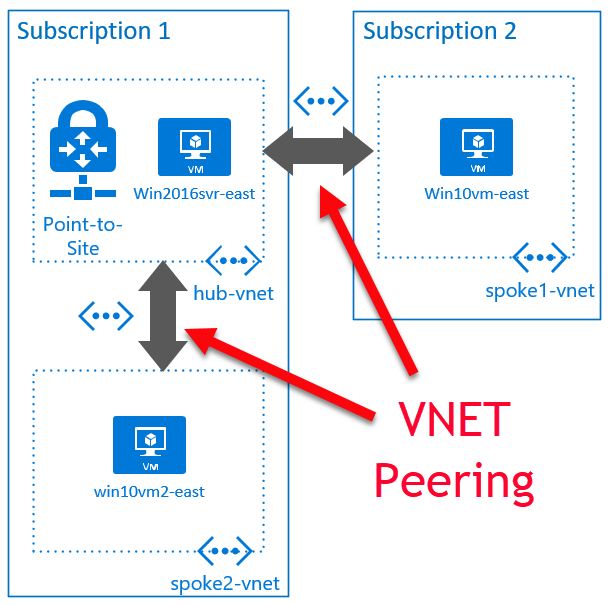
How I connect three existing VNETs
I am starting with these resources:
Subscription 1:
- hub-vnet – the VNET with the Point-to-Site VPN configured
- vnet-gw – the VNET gateway
- win2016svr-east – VM inside the VNET with no public IP (Windows Server 2016 DataCenter)
- spoke2-vnet – second VNET with no gateway o win10vm2-east – VM inside the VNET with no public IP (Windows 10 image) Subscription 2:
- spoke1-vnet – VNET in another subscription (but same Azure Active Directory) o win10vm-east – VM inside the VNET with no public IP (Windows 10 image)

Part 1:
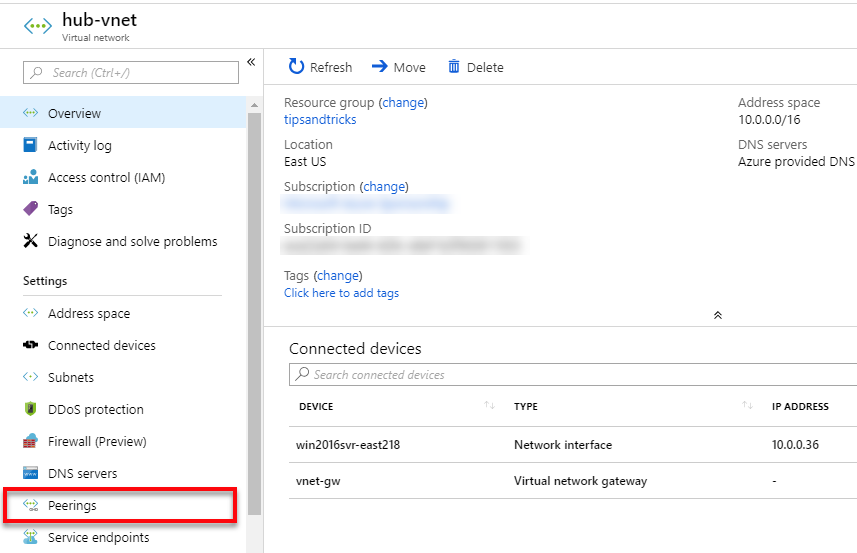
- In the Azure portal, I go to the hub-vnet virtual network, select Peerings, and click the Add button.
- I give the peering the name hub-spoke2-peer and select the subscription and virtual network. Then I check the • I give the peering the name hub-spoke2-peer and select the subscription and virtual network. Then I check the Allow gateway transit and click the OK button. and click the OK button.
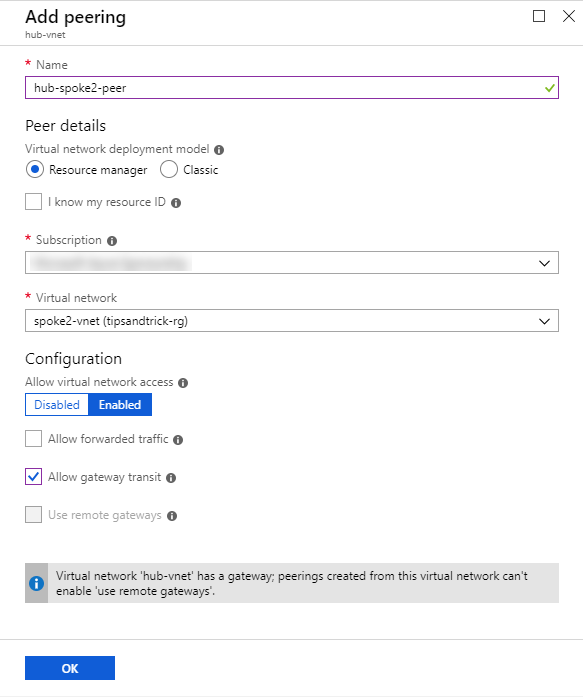
Note: Allow gateway transit is needed to make the Point-to-Site connection. Otherwise I would need to use a jumpbox.
Once this side of the peering is ready, it will show the status as Initiated.

- I repeat the above steps and add the peering for the hub-spoke1-peer.
That sets up the hub side of the peering. The next step is the spoke side.
Part 2:
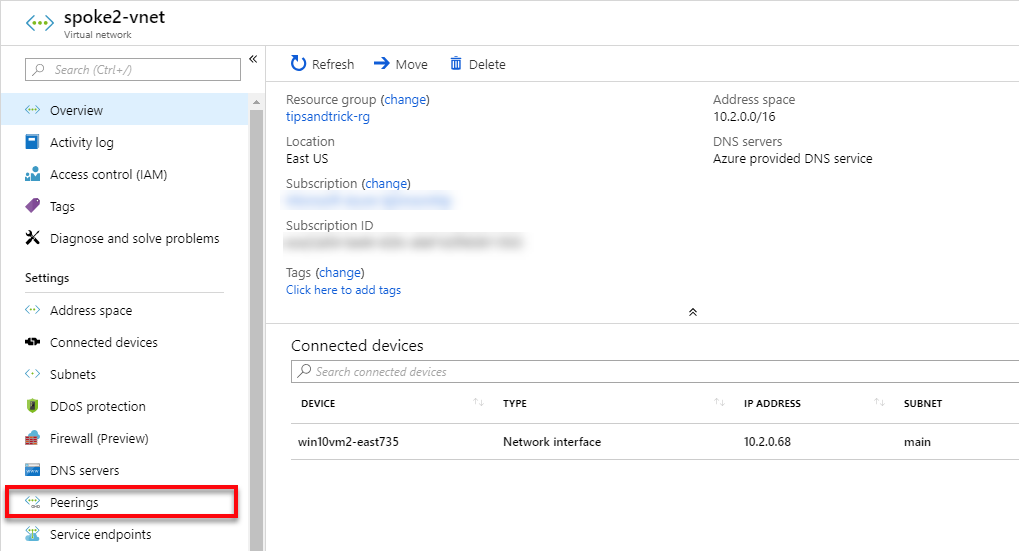
- In the Azure portal, I select Virtual Networks, select the spoke2-vnet, then select Peerings.
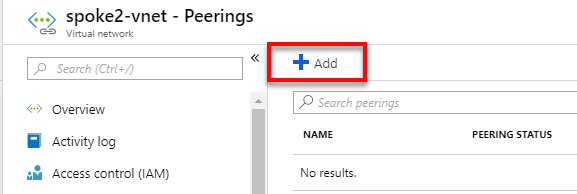
- Click the Add button.
- I give the peering the reverse name spoke2-hub-peer, select the subscription and virtual network of hub-vnet, and check the Use remote gateway. Then I click OK to create the peering.
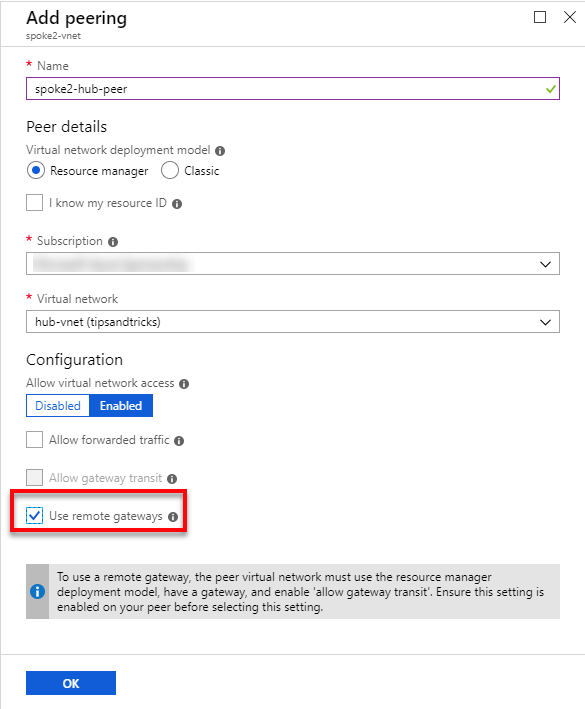
Note: Use remote gateways is the reverse setting of the one that allows the usage of the gateway in hub-vnet.
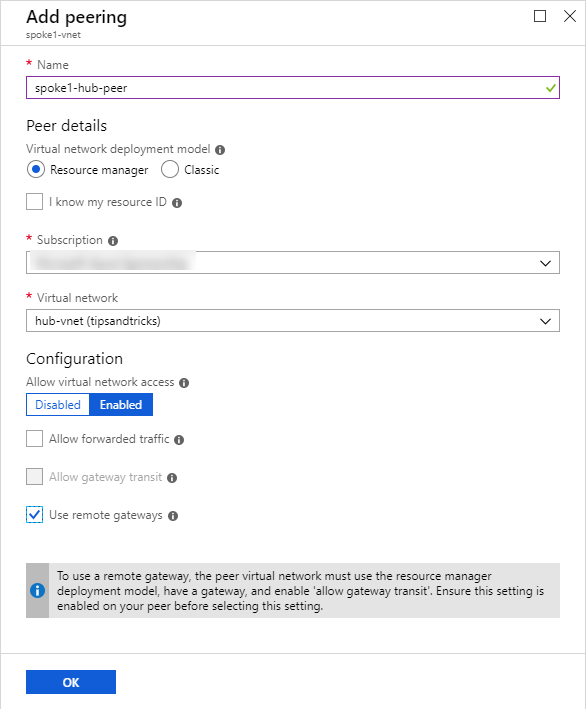
- Now I go back to my virtual networks list and repeat for spoke1-vnet.
I now have the VNET peerings shown below:
Part 3:
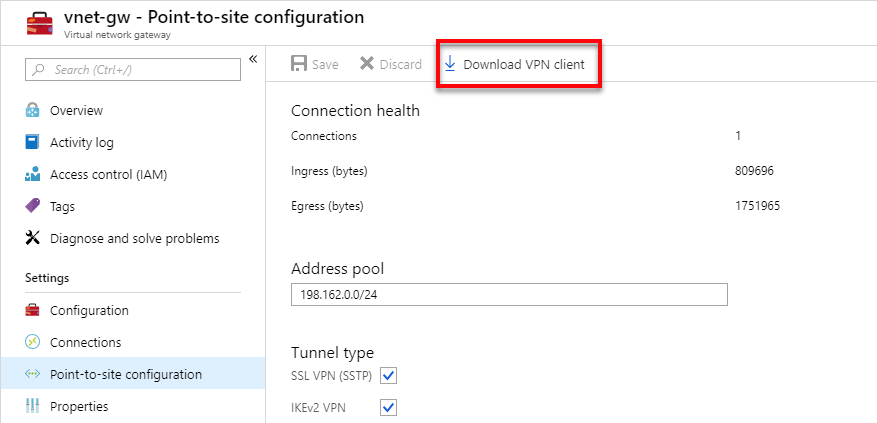
To test that I can connect to each of the VMs, I first need to download the VPN client again.
- In the Azure portal, I search for vnet-gw and select it from the results, and then select Point-to-site configuration.

- Then I click Download VPN client and reinstall it once it downloads.
Once I have it reinstalled, I connect the VPN.
- I open remote desktop (type mstsc at the command prompt or make sure you read Quickly Connect to Windows VMs with RDP) and, one by one, I verify that I can connect to the private IPs for the VMs:
- Win2016svr-east: 10.0.0.36
- Win10vm-east: 10.1.0.68
- Win10vm2-east: 10.2.0.68
That’s all it takes to connect all three VNETs using VNET peering!
Read the full detail of how to Implement a hub-spoke network topology in Azure on the Azure Architecture site or watch Virtual Network (vNet) Peering on Azure Friday.
ATTENTION: If you liked this post and want to suggest future topics of Azure Tips and Tricks then complete this survey.
Want more Azure Tips and Tricks?
If you’d like to learn more Azure Tips and Tricks, then follow me on twitter or stay tuned to this blog! I’d also love to hear your tips and tricks for working in Azure, just leave a comment below.
Leave a Comment