
Azure Tips and Tricks Part 180 - Taking a peek at Azure Key Vault Part 1 of 2
NEW: Get your copy of the BEST Azure Tips and Tricks of all time in this FREE eBook now!
The Complete List of Azure Tips and Tricks
Taking a peek at Azure Key Vault Part 1 of 2
| This post | Part 2 - coming tomorrow |
One of the more vexing problems for developers is securing access to other services used by their applications. Databases and other restricted resources need authentication, and your apps need to provide that, but how? Passwords within your code? (Un)encrypted configuration files? Certificate stores? Hardware? And who safeguards and manages these resources?
Addressing these concerns is the primary objective of Azure Key Vault, a globally available service to store and manage three types of assets:
- Secrets - sensitive strings like passwords and database connection strings. You might store your application’s database password as a secret, for instance.
- Encryption keys - RSA or Elliptic Curve keys that you would use for cryptographic operations such as encrypting application data for transit or storage.
- Certificates - X.509 certificates that you may provision through Azure Key Vault or via other providers like DigiCert.
In this post, you’re going to see how to create and manage a secret, but keys work in much the same way. Certificates are a little more complex, and in fact themselves used keys and secrets. Check out Get started with Key Vault Certificates for more information specifically on certificates.
Creating a Key Vault Account
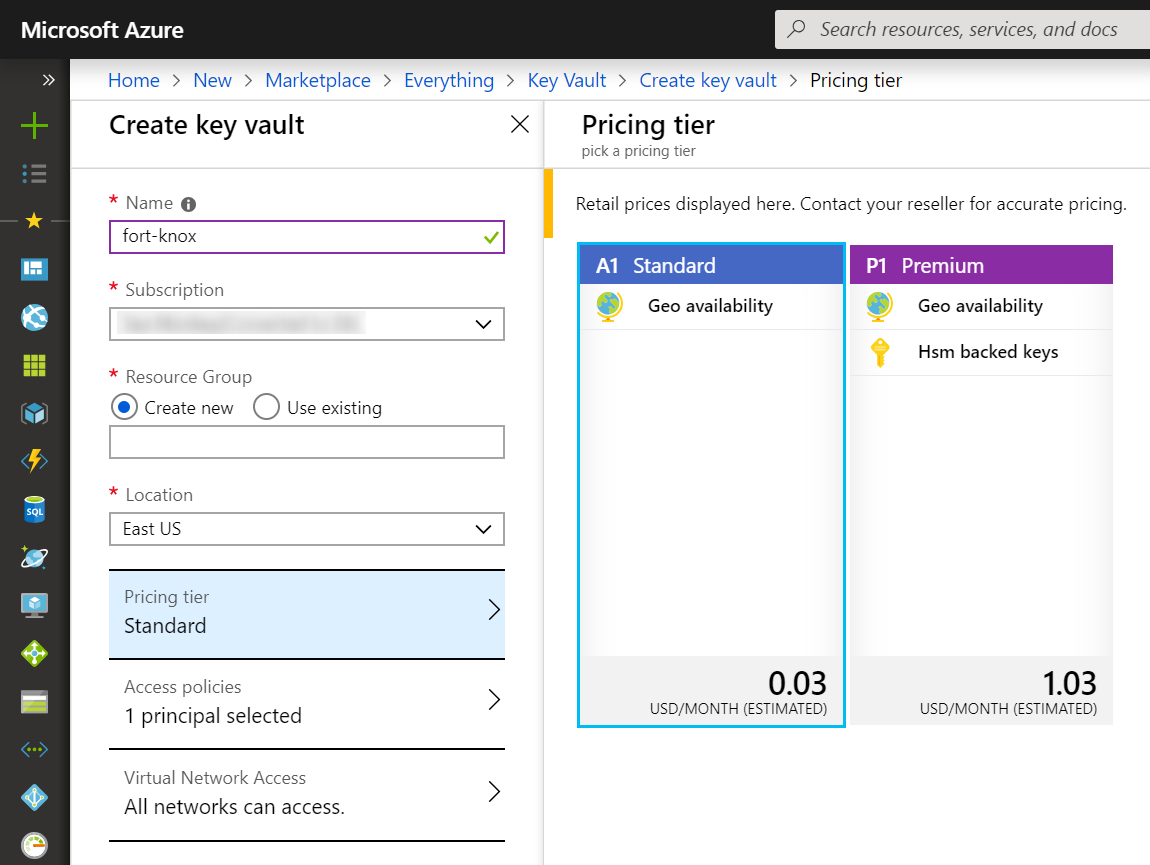
Let’s start by creating a new Key Vault service in the Azure portal. In the Create Key Vault blade (below), provide a unique name for your vault (which, as with most services, becomes an endpoint for invoking the service) and pick (or create) a resource group and a pricing tier. There are currently two tiers, Standard and Premium; the latter supports keys protected by a hardware security module (HSM). Use the standard option for this exercise.
Access to the Key Vault is managed via policies to which principals (like users and applications) can be assigned. By default, the user creating the vault is granted all permissions to keys, secrets, and certificates, but in practice you will grant more detailed policies to specific principals.
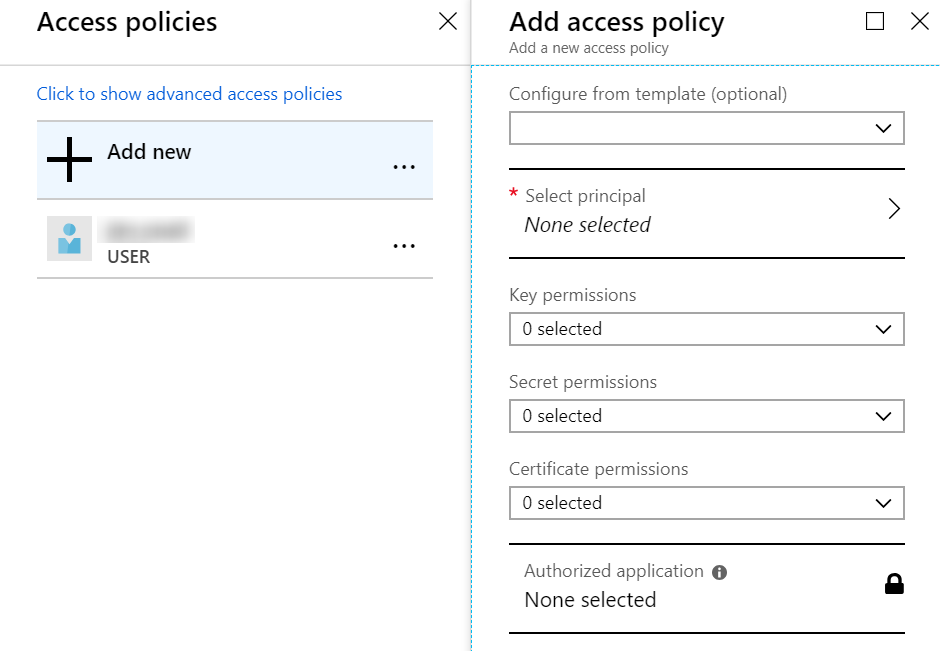
Indeed, across the three entities (keys, secrets, and certificates), there are 40 permissions that can be individually granted, thus supporting the principle of least privilege. For instance, a web API that is accessing SQL Server might have GET permission on the secrets store, but only members of the security team would have SET permission to modify the database password. That’s a simplistic example, so here’s another scenario involving developers, the security team, and even auditors.
Adding a Secret
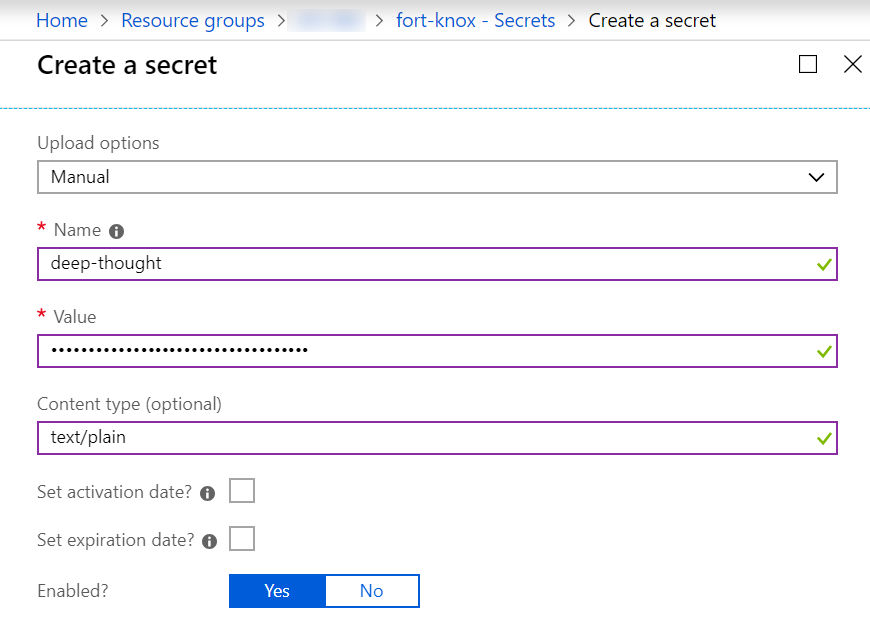
On the left sidebar menu of the Key Vault blade in the Azure portal, you can easily create or import a secret, key, or certificate. Since we’re just interested in a secret now, we simply provide a name-value pair and options to manage the window of accessibility to that secret.
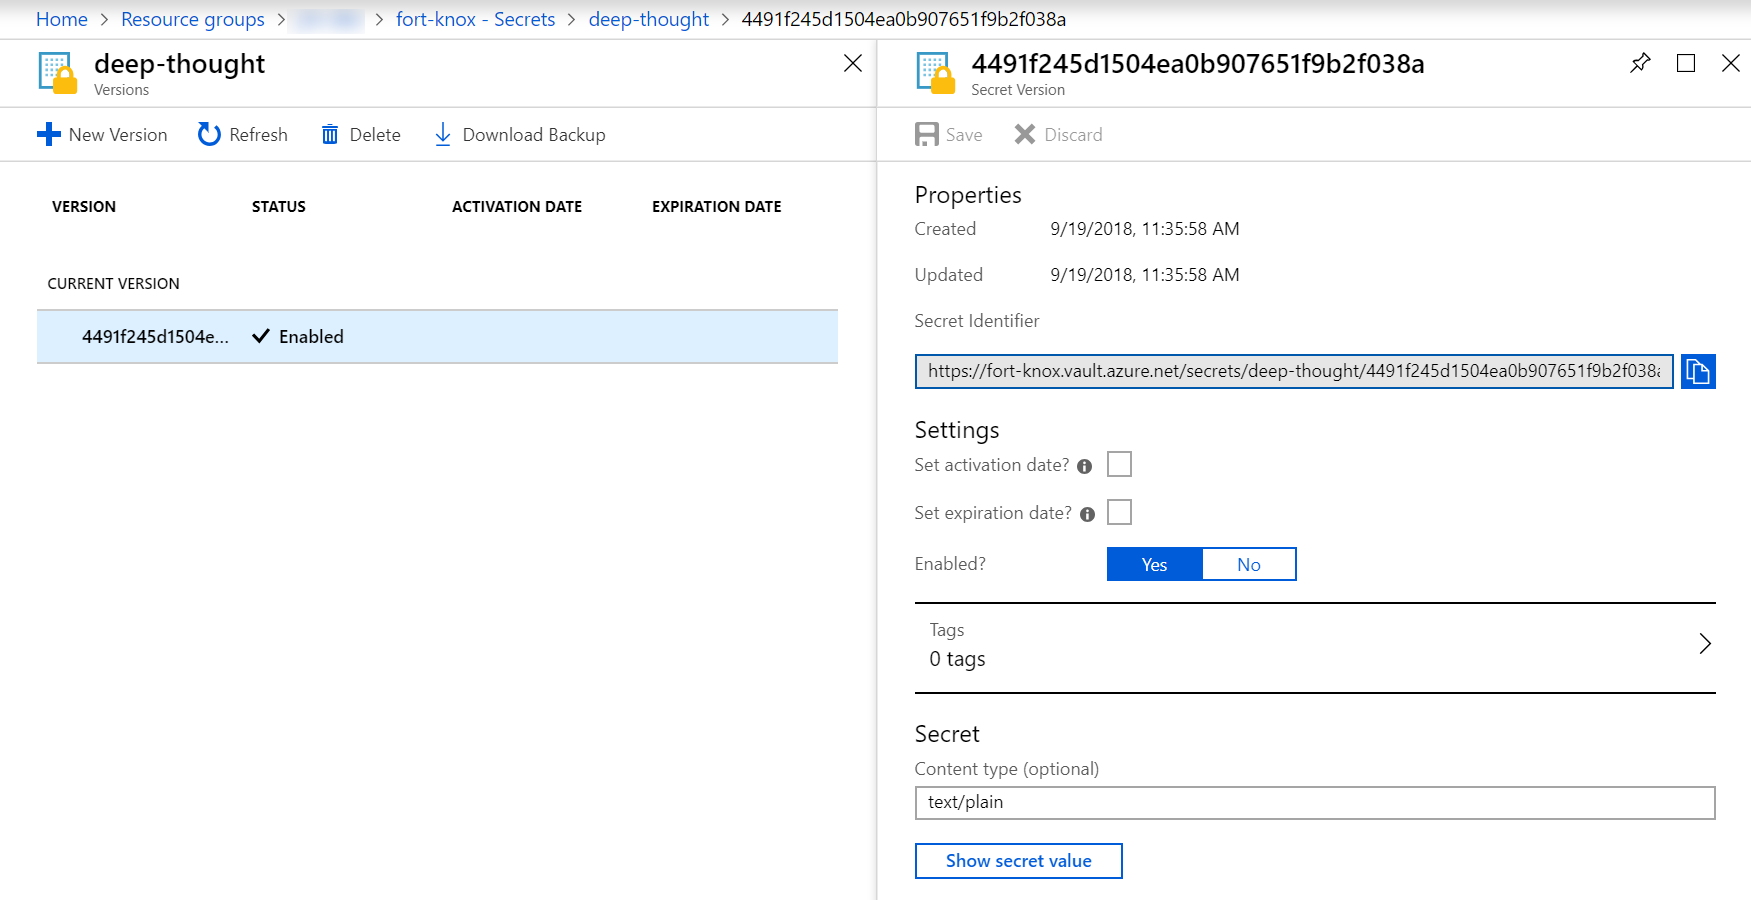
Once the secret is created, you’ll notice that there is a bit more depth to this than a simple key-value pair. For each secret, a versioning history is automatically maintained, and through the Secret Identifier URI you can access any version of that secret. This provides a bit of an audit trail and can help implement policies to forbid reuse of actual or derived values of previous secrets.
Although the Azure portal is a convenient visual approach to interact with Key Vault, for most scenarios you will want to have a repeatable and isolated process for managing Key Vault. Supporting that are the Azure CLI and PowerShell cmdlets as well as integration with Azure Resource Manager (ARM) templates. From the perspective of consuming secrets (as well as keys and certificates) from Key Vault within your applications, SDKs and libraries are available in .NET, Java, Node.js, and Python, and, of course, you can use the REST API from any programming environment that supports HTTP. We’ll look at a small sample using the .NET SDK in the next installment.
ATTENTION: Help shape the future of Azure Tips and Tricks by telling me what you’d like for me to write about! Help me help you by filling out this quick survey.
Want more Azure Tips and Tricks?
If you’d like to learn more Azure Tips and Tricks, then follow me on twitter or stay tuned to this blog! I’d also love to hear your tips and tricks for working in Azure, just leave a comment below.
Leave a Comment