
Azure Tips and Tricks Part 177 - Getting Started with Azure Information Protection
ATTENTION: After a solid year and a half of posting 2x a week, I’ve decided to take some time off starting starting December 2018. The series will resume starting early January 2019.
The Complete List of Azure Tips and Tricks
Getting Started with Azure Information Protection
Azure Information Protection (AIP) is a Microsoft Azure offering that works in conjunction with Microsoft Online services (Exchange Online, SharePoint Online, etc.) and Office 365 to categorize and protect documents and emails using labels and policies defined by an administrator. As a cloud-based solution, AIP is an evolution of a variety of technologies all focused on rights management, and it uses Azure Rights Management as its protection technology.
Getting started requires an Azure subscription that includes AIP, and your organization would typically get this via Enterprise Mobility + Security, Microsoft 365 Enterprise, or volume licensing, or perhaps through a Cloud Solution Provider. To familiarize yourself with capabilities, though, you can sign up for a free trial of Enterprise Mobility + Security E5 and get your own tenant with AIP.
Within the Azure portal, an administrator would define labels (and sublabels) to classify documents as well as policies to govern what can be done with those documents. AIP provides a set of default classification labels, but you can define whatever categories you like.
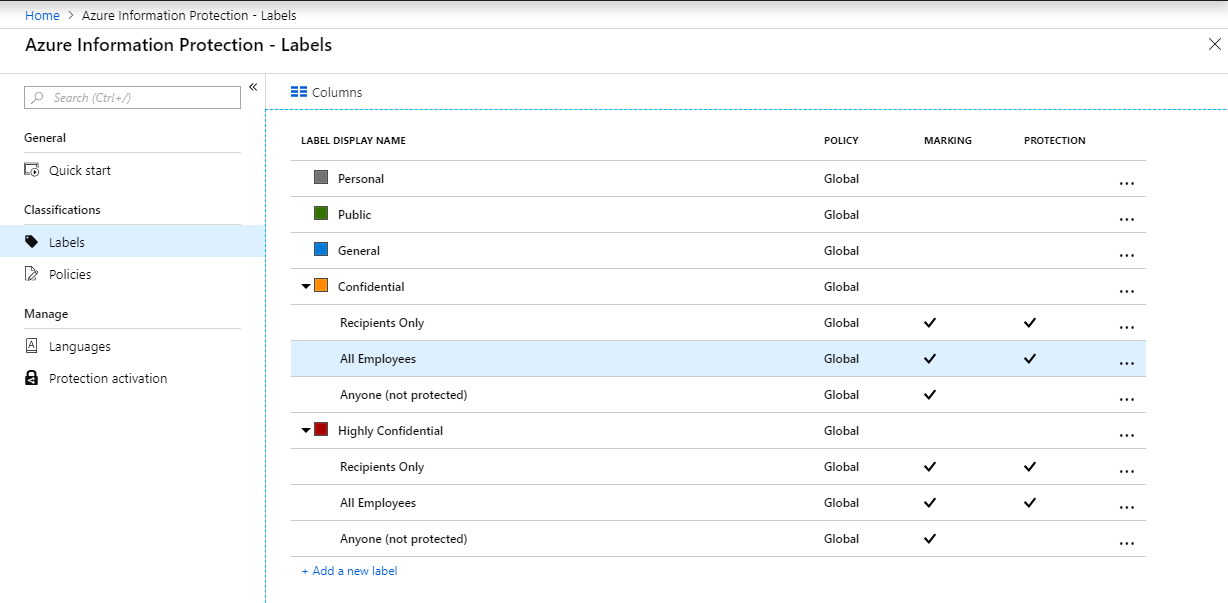
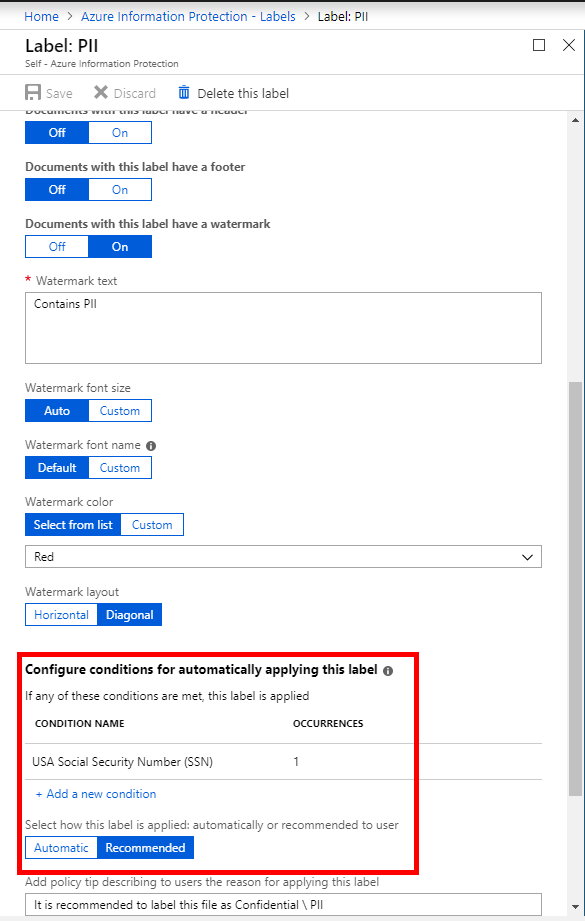
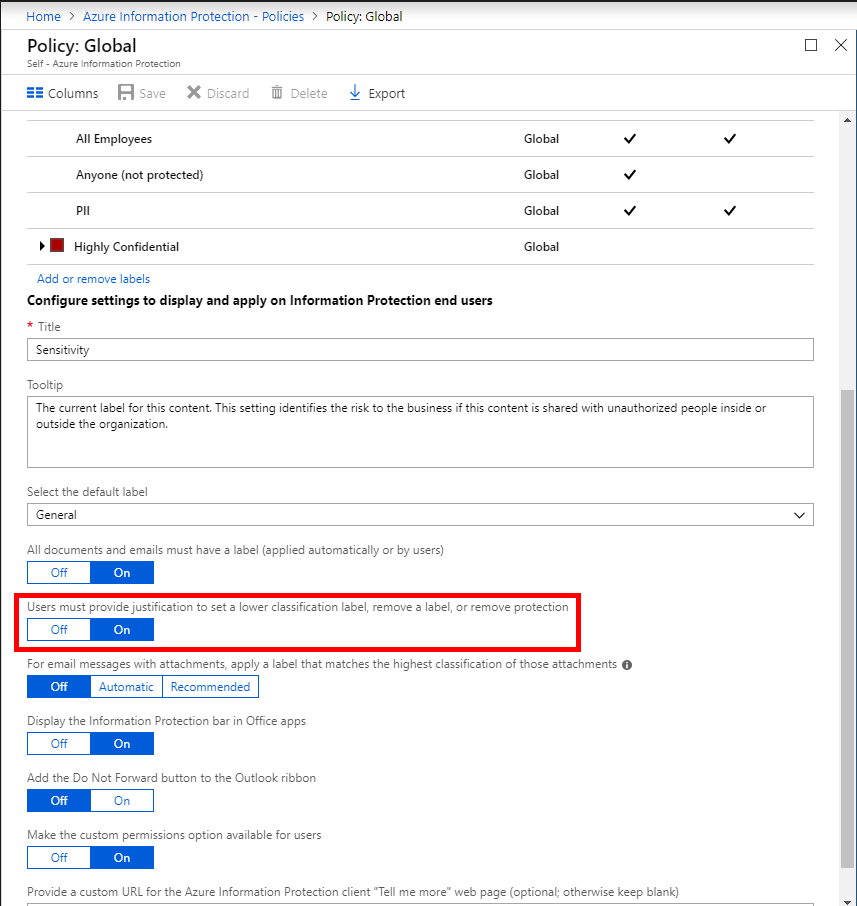
Each label, in turn, has a number of properties that indicate how documents with that label are marked (header, footer, watermark) and whether they should be protected from access by unauthorized users. Labels are included in one or more policies that govern conditions under which those labels are applied. For instance, you might want to automatically classify documents containing a Social Security number as personally identifiable information (PII) and enforce a policy that requires editors to explain any downgrading in the classification of such documents.
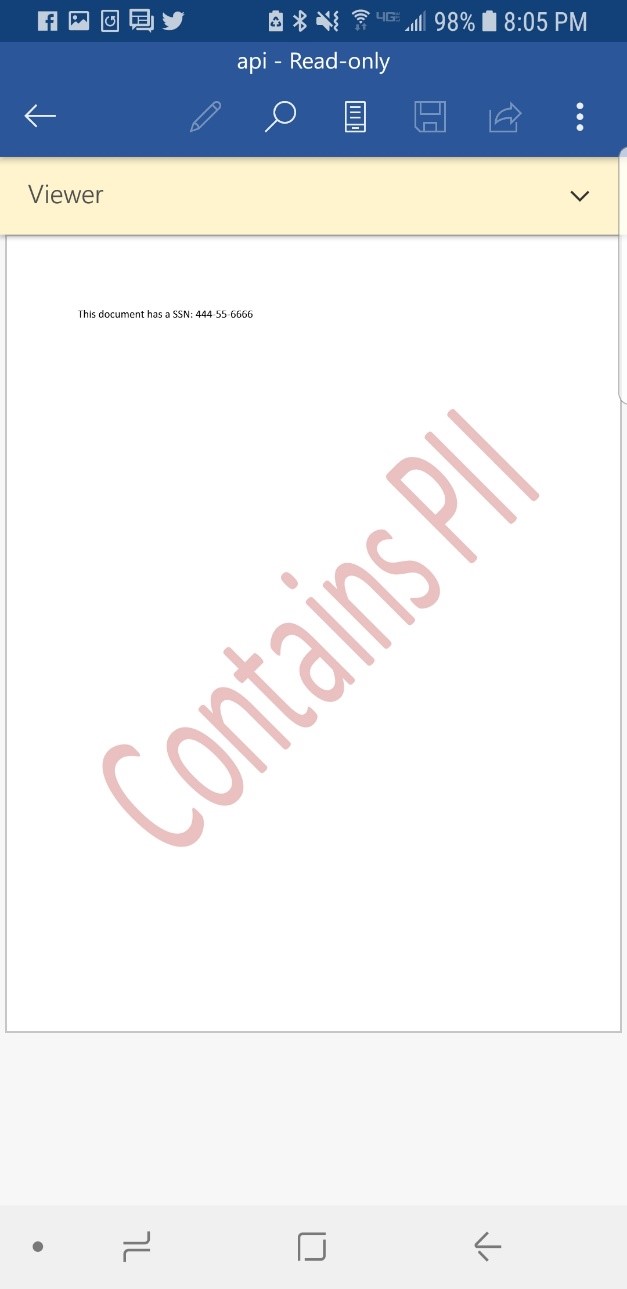
To actually label and protect files with AIP, you’ll need to install the Azure Information Protection client. Users of iOS, MacOS, and Android can still access protected documents via the Azure Information Protection viewer app.
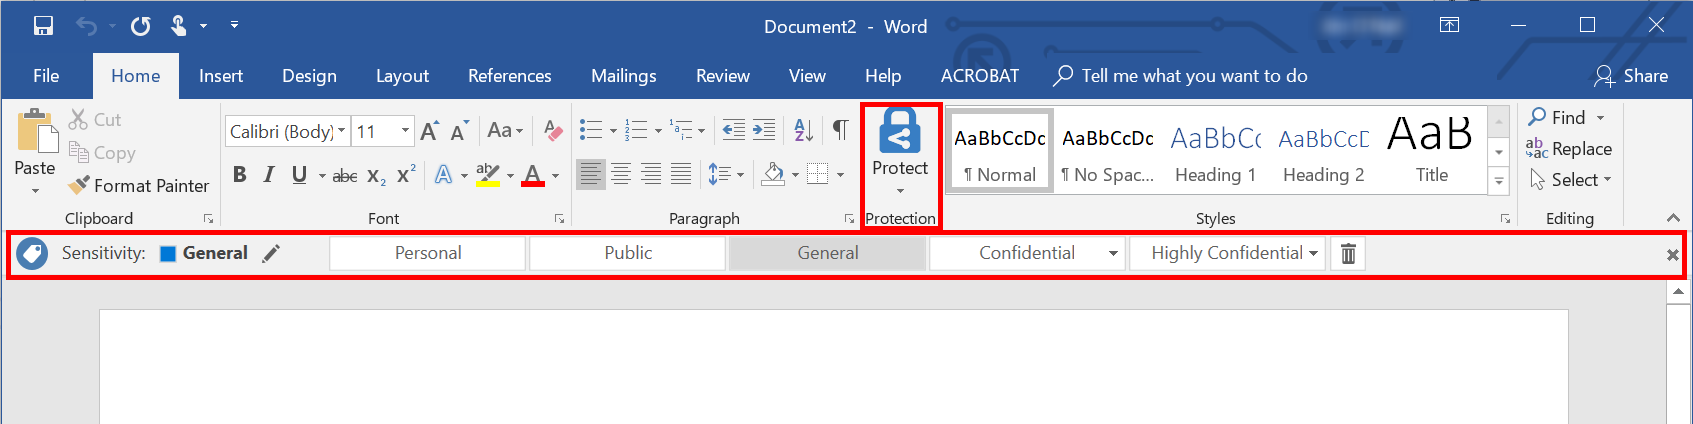
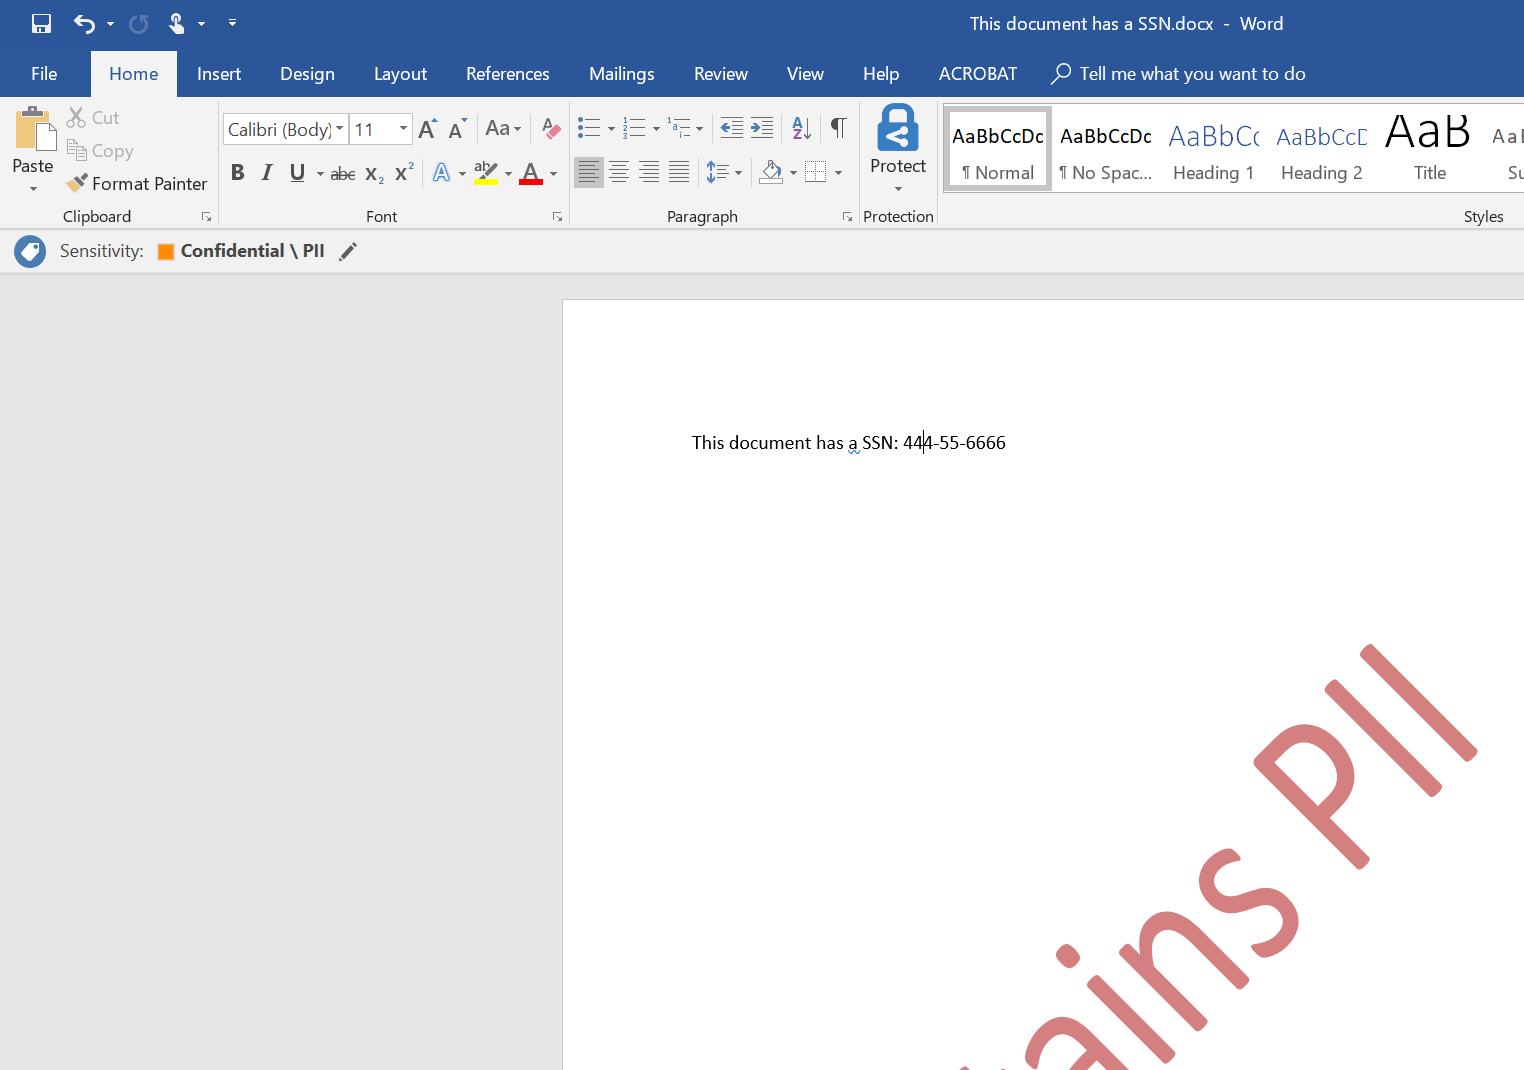
If you’ve installed the AIP client, your Office ribbons should include a Protect option, and as in the case of Microsoft Word below, you’ll see a menu bar reflecting the classifications of the AIP policy that applies. That policy information is automatically downloaded and updated when you sign into the AIP-enabled tenant within your Office app.
Now, if you were to create and save a new document containing text that resembles a Social Security number, you’d be prompted to adjust the classification of the document accordingly. Had the condition been configured to automatically apply the label, that would have occurred without prompting. With the application of the PII label, the sensitivity level is updated and the (optional) watermark that was configured for that label appears.
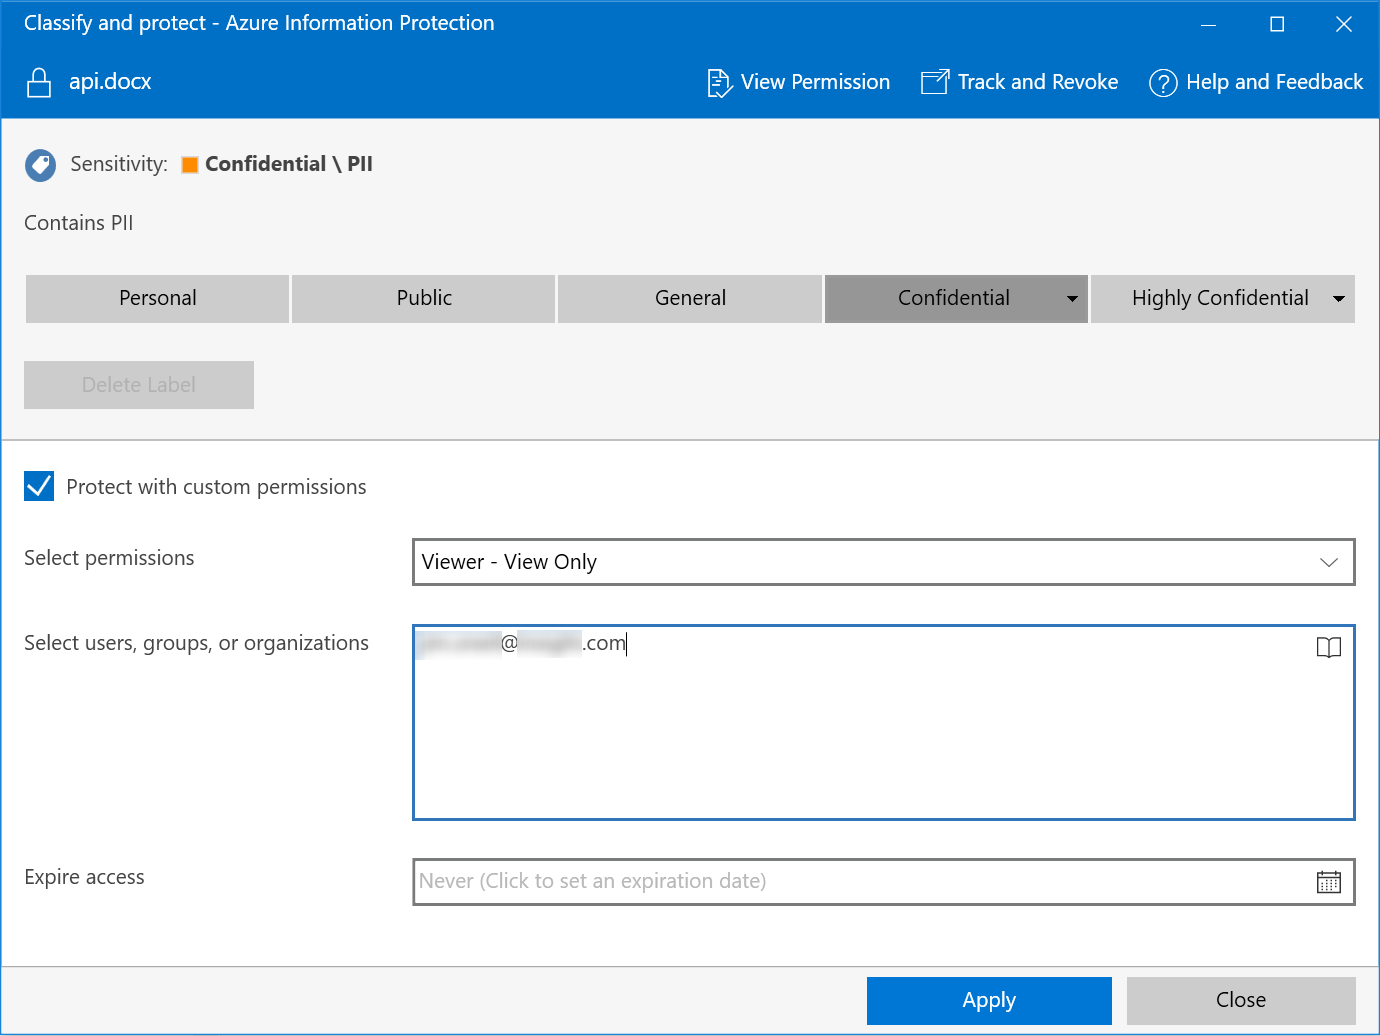
Now let’s say you want to share this document (or one that was created before you installed the AIP client) with an individual in another organization. Within File Explorer, you’ll find a context menu option named Classify and Protect, which allows you to apply marking and protection to files (of supported types). Using custom permissions, you can single out the recipients and then attach the file to a work or school account email.
Authorized recipients will then be able to access the document with the assigned permissions, such as on an Android phone:
Unauthorized users will be met with a message that they will need to get permission from the document owner to open the document.
Clearly, Azure Information Protection requires an organizational investment not only in licensing costs but also in terms of planning and document governance. A quick-start tutorial goes into more detail in terms of implementation steps covered in this blog post. For those planning a rollout of a rights management solution, the Azure Information Protection deployment roadmap is a good guide to the steps for successful implementation.
ATTENTION: After a solid year and a half of posting 2x a week, I’ve decided to take some time off starting starting December 2018. The series will resume starting early January 2019.
Want more Azure Tips and Tricks?
If you’d like to learn more Azure Tips and Tricks, then follow me on twitter or stay tuned to this blog! I’d also love to hear your tips and tricks for working in Azure, just leave a comment below.
Leave a Comment