
Azure Tips and Tricks Part 169 - Part 2 - A quick tour around Azure DevOps Projects using Node.js and AKS
NEW: Get your copy of the BEST Azure Tips and Tricks of all time in this FREE eBook now!
The Complete List of Azure Tips and Tricks
A quick tour around Azure DevOps Projects and Node.js and Kubernetes Service
Yesterday on Azure Tips and Tricks
We discussed what Azure DevOps Projects are and began creating a project that uses Node.js and Azure Kubernetes Services (AKS). We walked through creating a project from scratch and began looking at the pipeline which included code and build. Today we’ll finish up the pipeline section by looking at dev. We’ll also review the resources section. In case you haven’t read Part 1 then I’d suggest you do so now.
Finish up the pipelines section
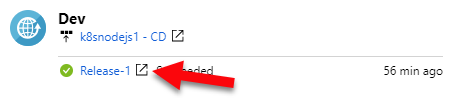
Back on the DevOps Project dashboard, click the Release link with the number Please make sure it is green - for a successful build)
Side note: If the build is red, then click on it to see what the error is. A common error that I’ve personally seen is: The subscription is not registered to use namespace ‘Microsoft.ContainerService’ One way to quickly resolve that is by bringing up Cloud Shell and selecting PowerShell and running the following command:
PS Azure:\> Register-AzureRmResourceProvider -ProviderNamespace “Microsoft.ContainerService”


ProviderNamespace : Microsoft.ContainerService
RegistrationState : Registering
ResourceTypes     : {containerServices, managedClusters, locations, locations/operationresults...}
Locations         : {Japan East, Central US, East US 2, Japan West...}
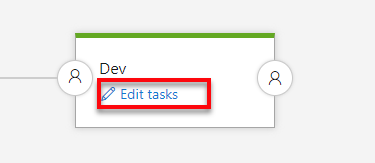
Now you’ll see the Azure DevOps Pipeline releases. Click the Edit release button at the top.

Then click the Edit tasks link.
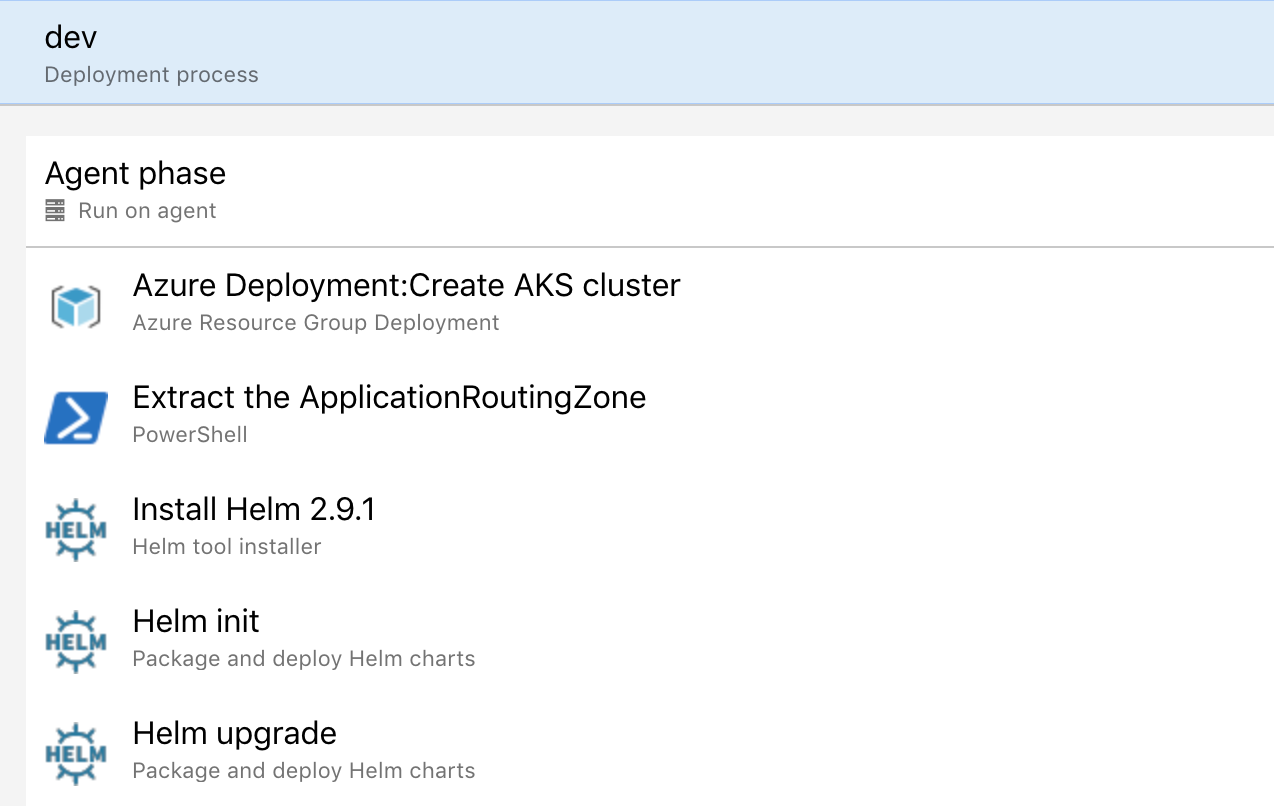
You now see the list of tasks that need to be run such as Creating the AKS cluster, running a PowerShell script and packaging and deploying helm charts.
That wraps up the Pipelines section and gives you a taste of how powerful Azure DevOps is. In this next section, we’ll look at the Azure Resources section.
Azure resources in a nutshell
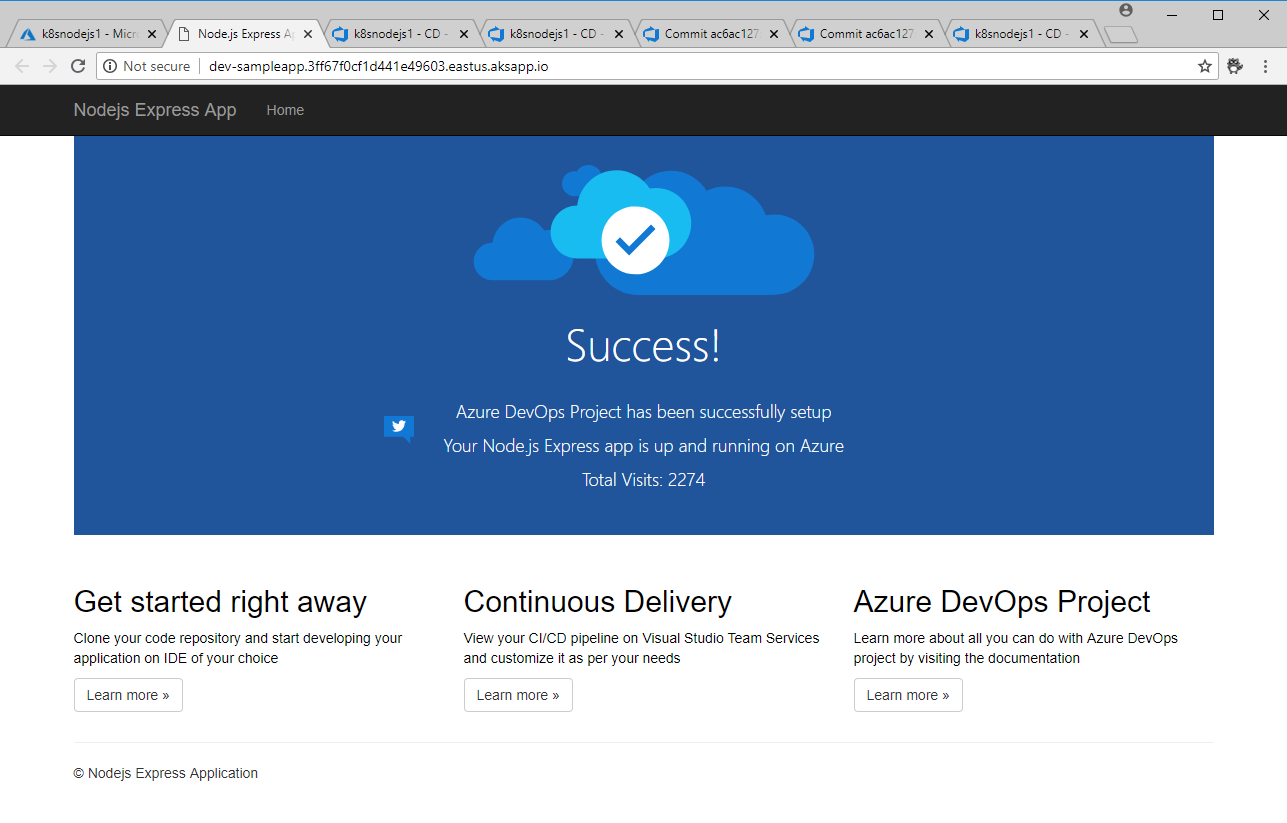
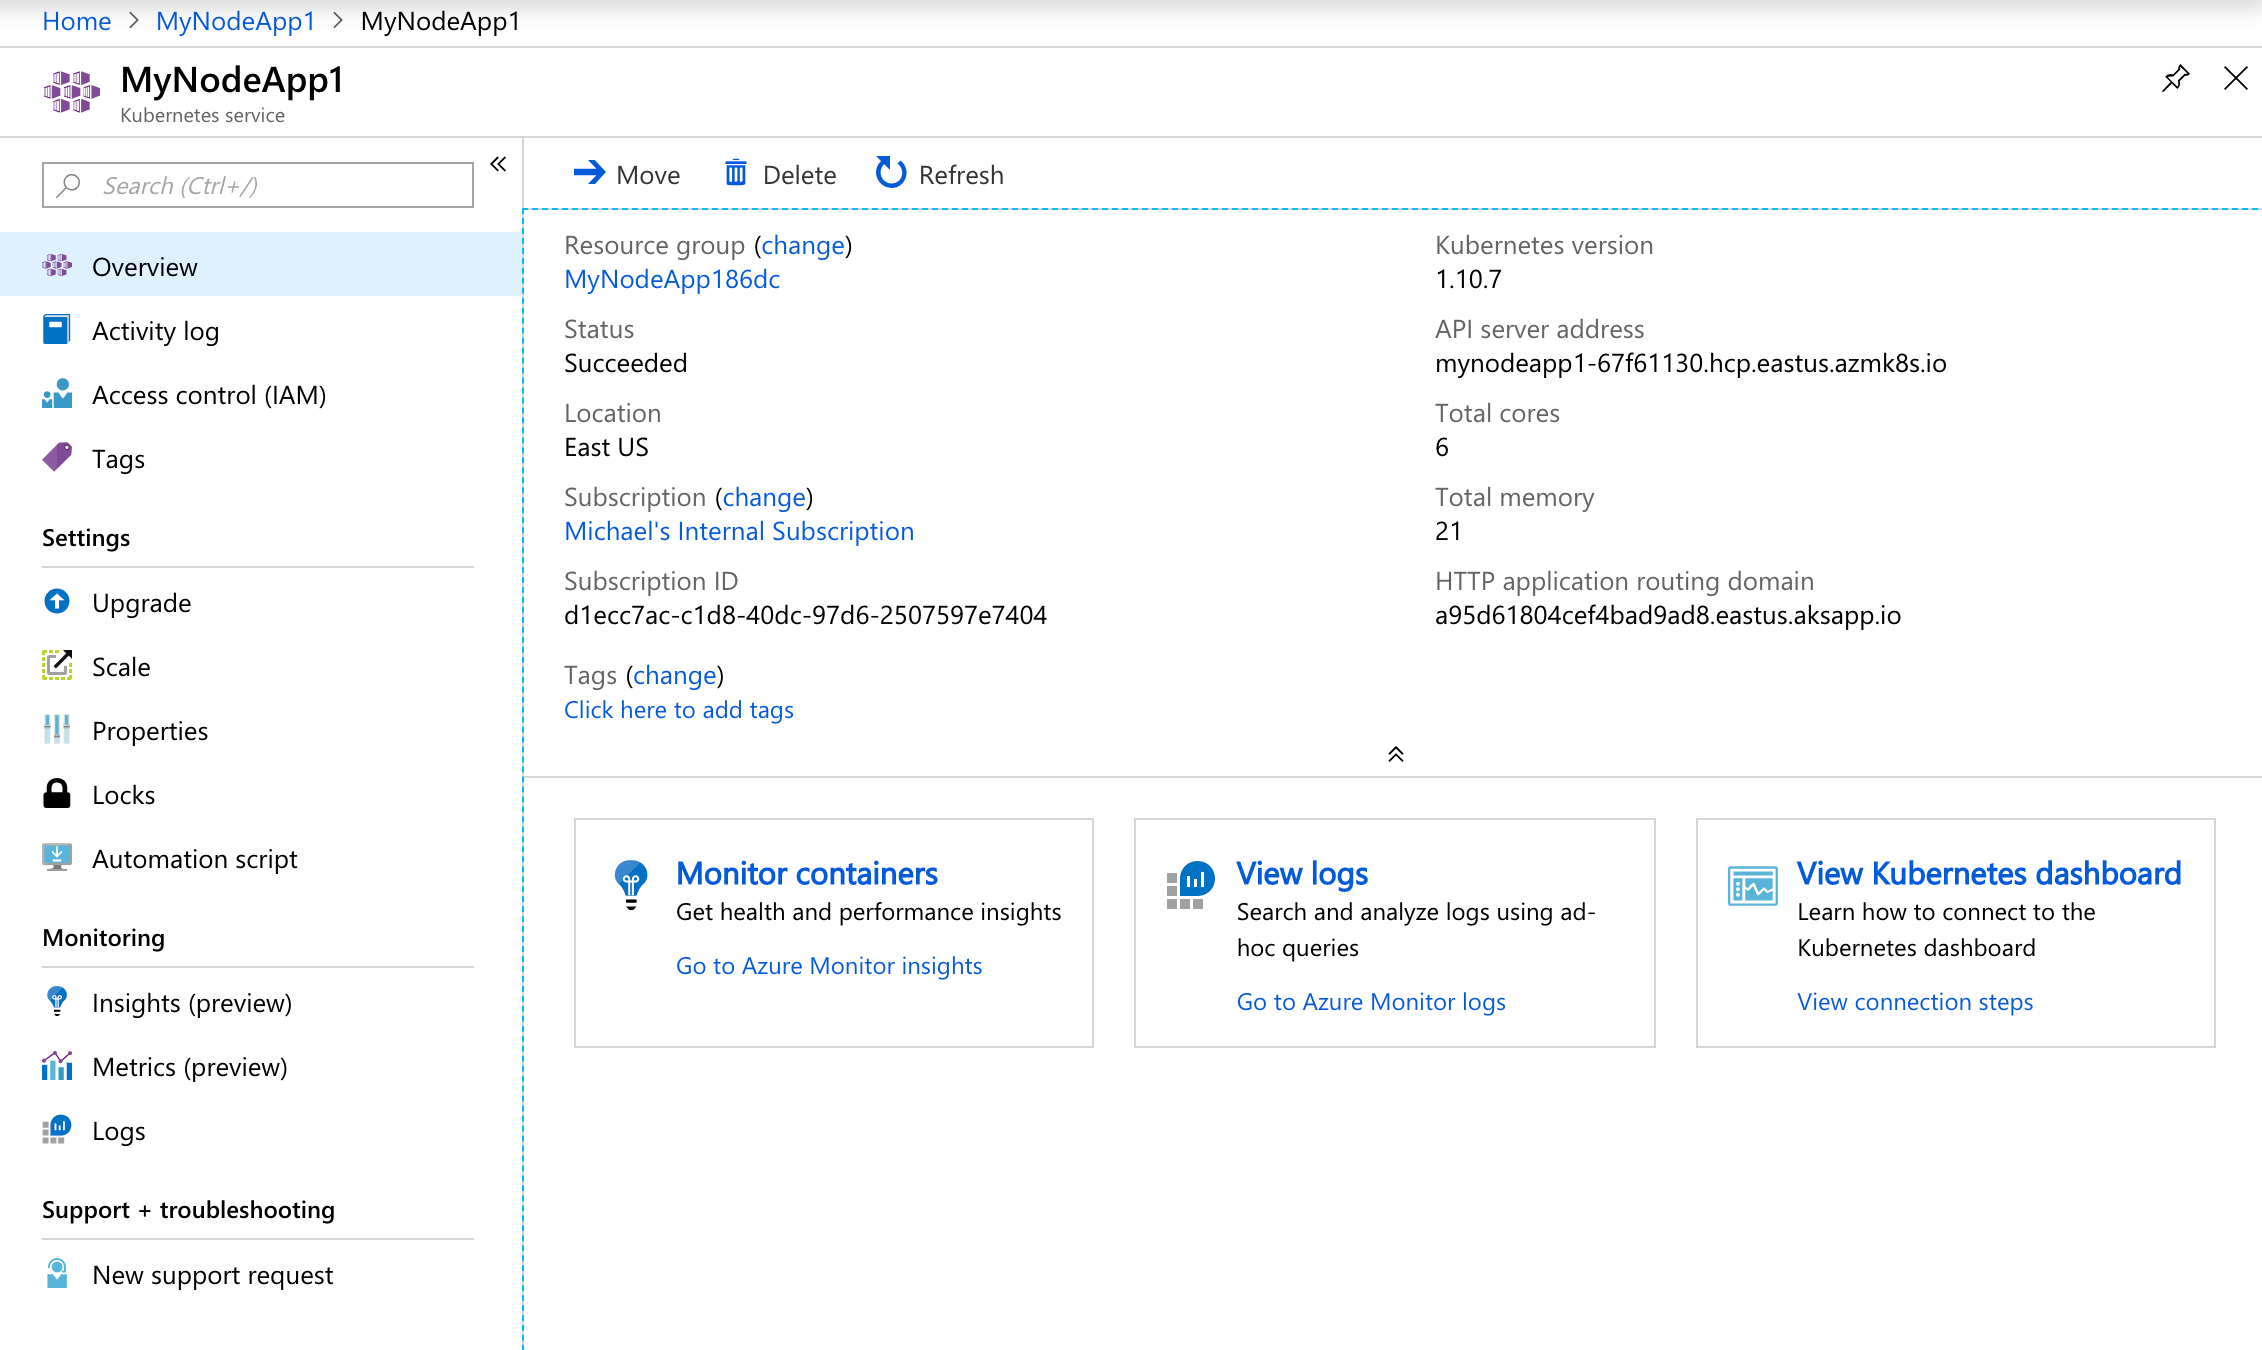
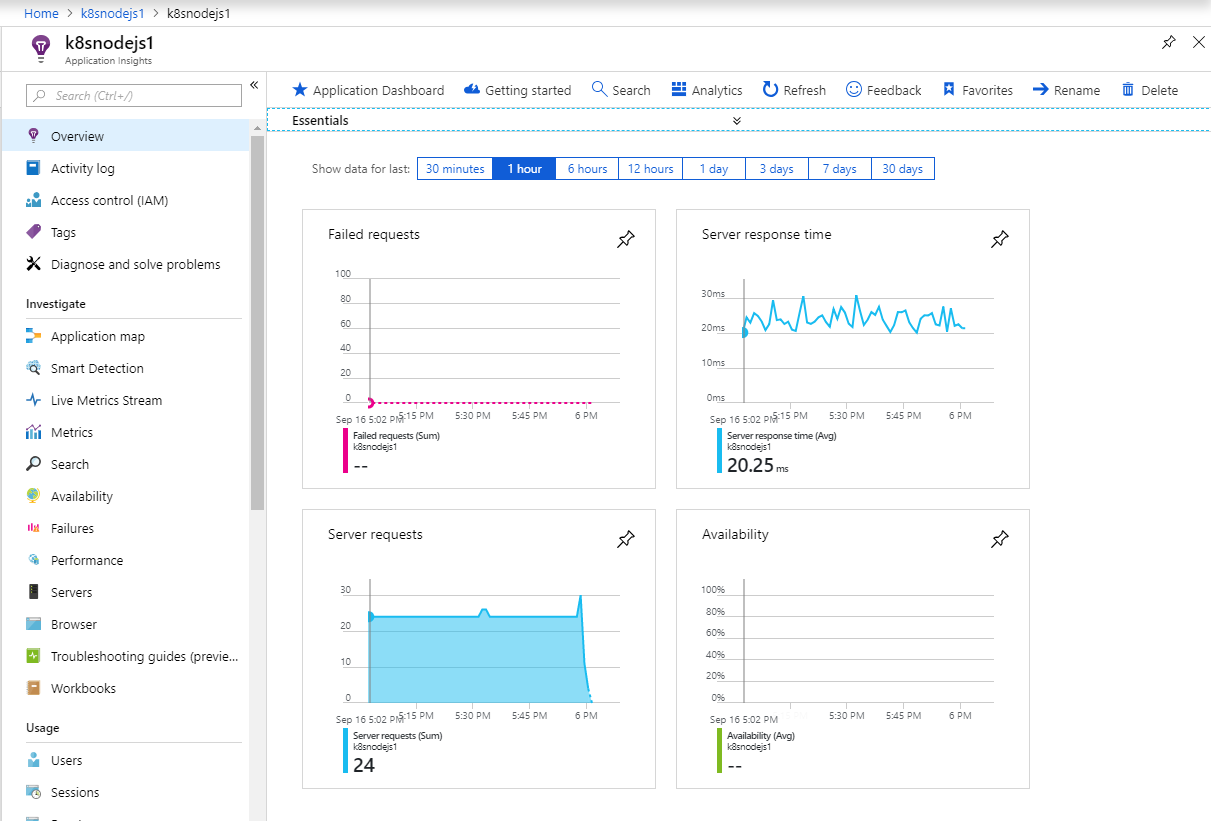
Back in the DevOps Project dashboard, let’s look at the Azure resources and Application Insights. The resources are the URL to your live site running in Kubernetes and a link to the AKS cluster. The last link will take you to see the live telemetry for your site provided by Application Insights.
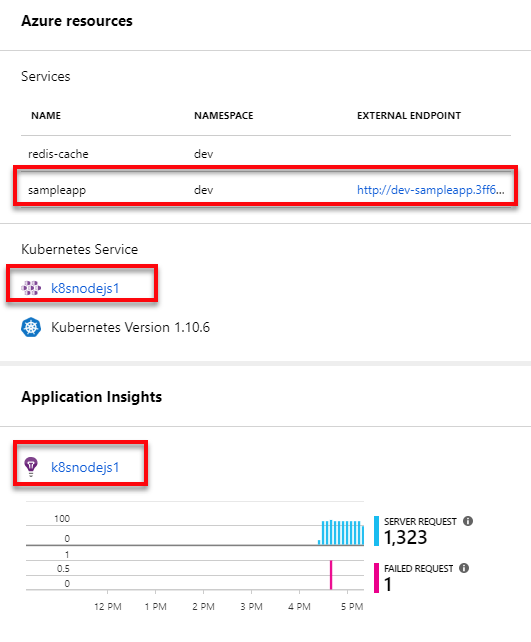
Click on the External Endpoint link to be taken to the deployed application.
The second link is to the Azure Kubernetes Service.
The last link shows the Application Insights created for the service which includes powerful analytics tools to help you diagnose issues and to understand what users actually do with your app. It’s designed to help you continuously improve performance and usability and works seamlessly with Azure DevOps
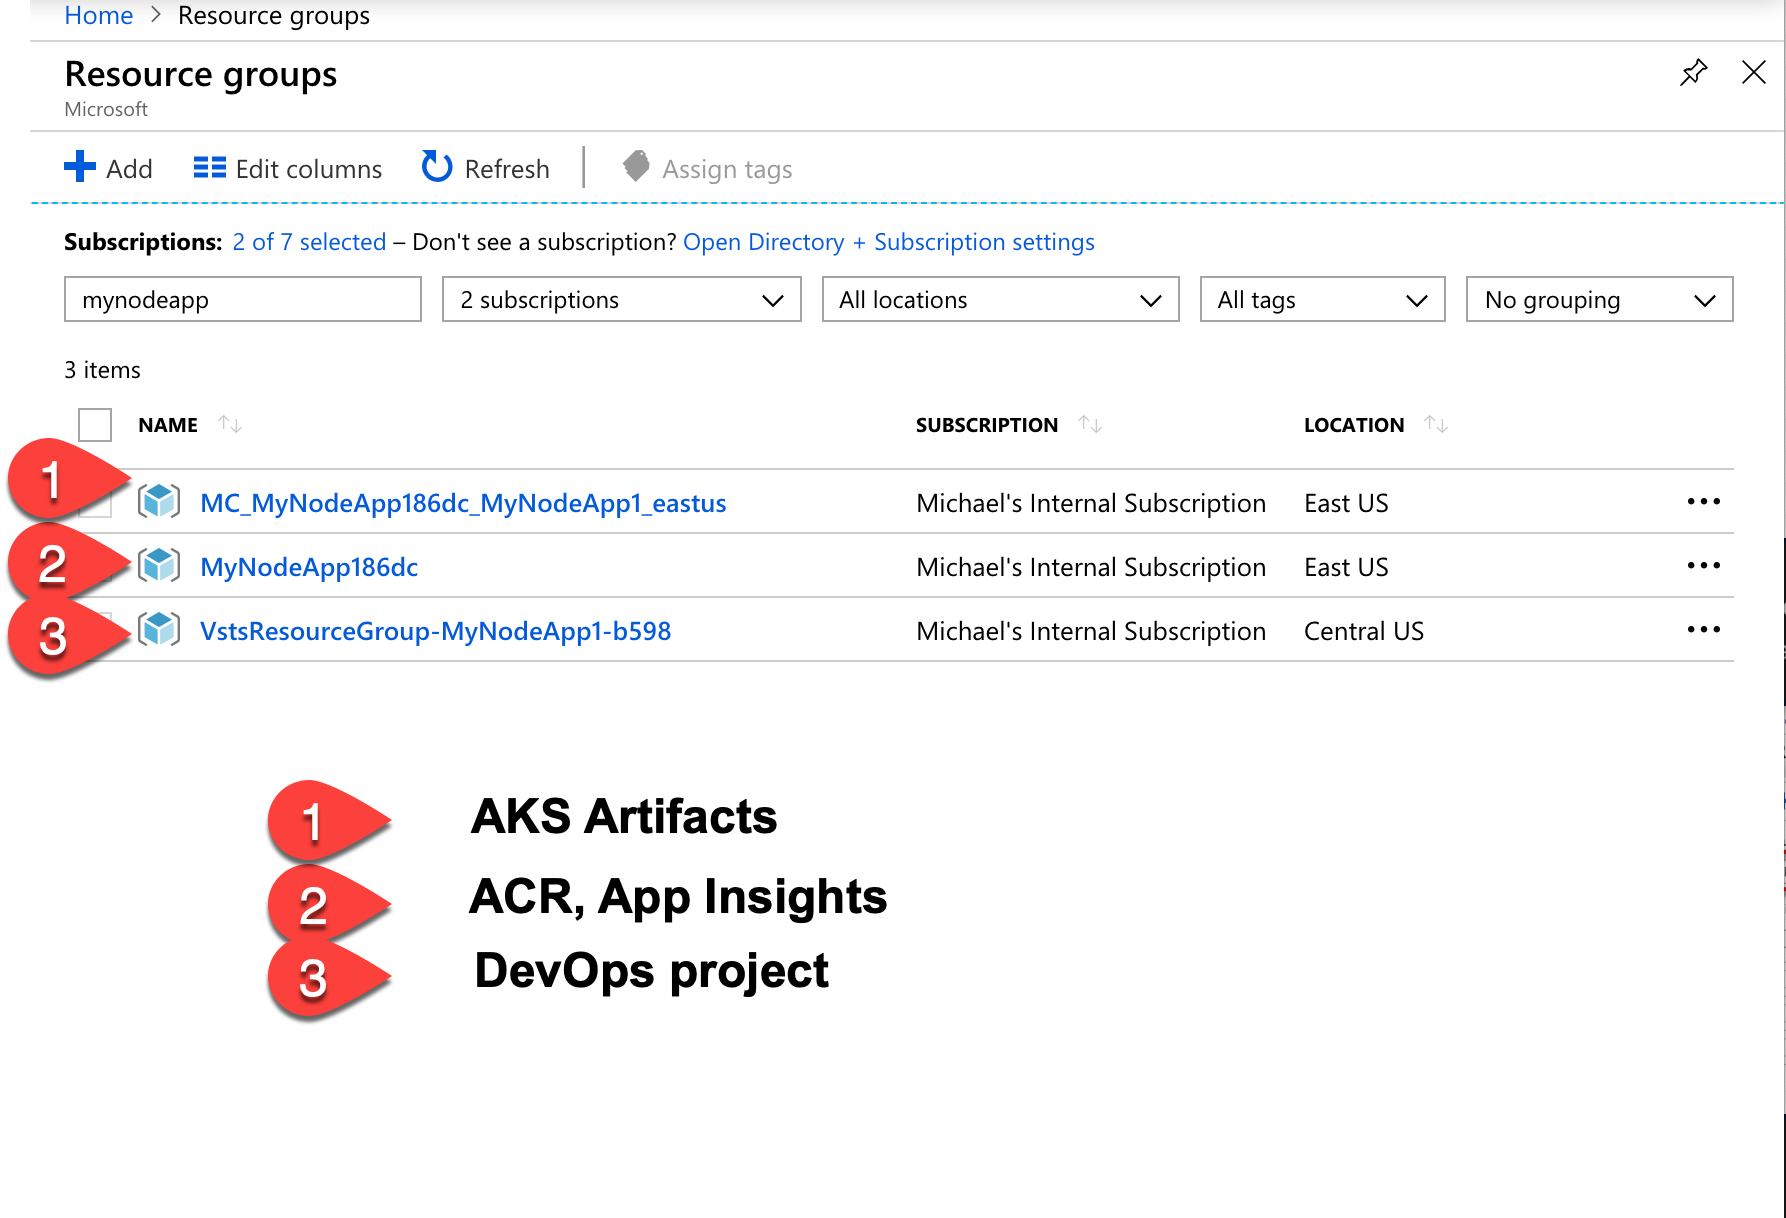
Now if you go to Resource Groups on the Azure portal and search for the name of the DevOps project, you’ll see that three resource groups were created.
I hope that was helpful and hope that you continue learning by going through the step by step tutorial or read more about Azure DevOps.
NEW: Get your copy of the BEST Azure Tips and Tricks of all time in this FREE eBook now!
Want more Azure Tips and Tricks?
If you’d like to learn more Azure Tips and Tricks, then follow me on twitter or stay tuned to this blog! I’d also love to hear your tips and tricks for working in Azure, just leave a comment below.
Leave a Comment